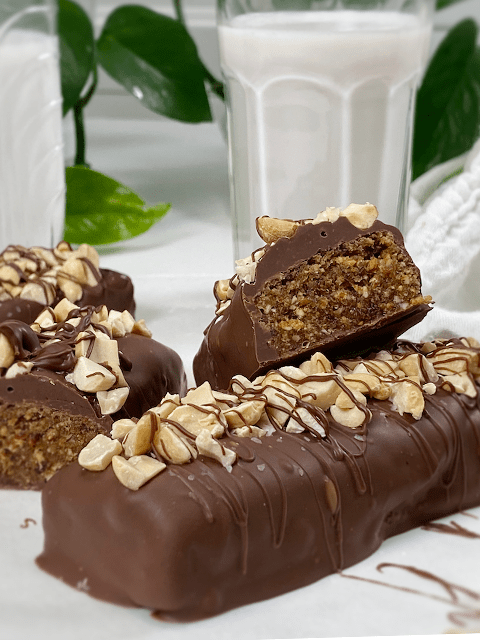
Minty Chocolate Truffles

 Add to favorites

~ raw, vegan, gluten-free, nut-free ~
A few years ago my husband and I dabbled in the art of making chocolates. We took a three-month chocolatier course that basically just gave us a taste (literally) of what a true art form making chocolates is all about. Even though we were eating a high raw diet at the time (and now) we wanted to understand everything there was to know about chocolate.
Having a bit of that knowledge helped me feel a bit more comfortable in my kitchen yesterday. But I will say that there are some major differences when it comes to dealing with raw chocolates.
With raw, you don’t always dabble with the whole tempering process so coming up with a hardening chocolate that retains a bit of shine is a challenge. I tried three different recipes until I finally settled on this one.
The other two recipes that I tried didn’t meet the criteria that I was searching for but they didn’t go to waste. I popped them in the freezer and will use them later in cookie and cake recipes, where the texture won’t be noticed.
I created the recipe for the minty filling in these truffles, which I must say came out pretty darn good. I can’t wait to keep playing with this base recipe and see what other truffles pop up! With Valentine’s just around the corner, these would make wonderful gifts that can be individualized to your sweetheart’s liking!
Take note that the chocolate coating on these truffles will leave some finger-licking goodness behind. Keep these stored in the fridge or freezer until serving.
 Ingredients:
yields 44 (1 Tbsp sized)
- 3 cups (326 g) coconut flakes, unsweetened
- 3 Tbsp (63 g) maple syrup
- 1/4 cup (71 g) raw coconut butter
- 1 Tbsp (14 g) raw cold-pressed coconut oil
- 2 Tbsp (24 g) water
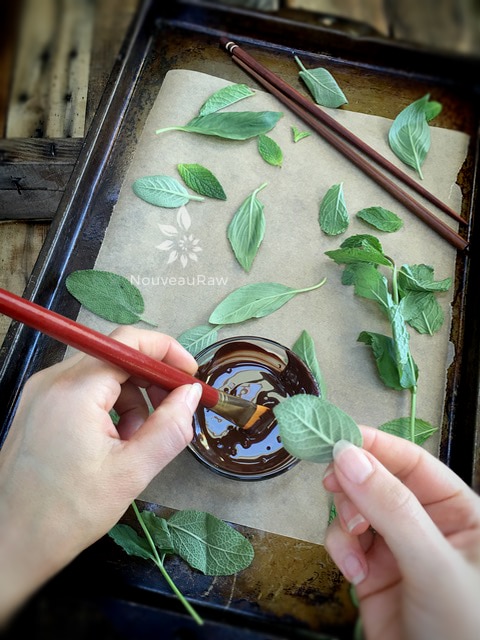
- 3 tsp mint extract or 1 cup (36 g) fresh mint leaves
- 1/8 tsp Himalayan pink salt
Chocolate coating:
- 1 cup raw cacao butter
- 1 cup raw cacao powder
- 1/3 cup sweetener; either agave, yacon, maple syrup
- 1 tsp sunflower lecithin
- 1 tsp vanilla liquid or seeds from one vanilla bean
Preparation:
Minty center:
- In a high powered blender with tamper or food processor, combine the shredded coconut, sweetener, coconut butter, coconut oil, water, mint, and salt. Process until creamy.
- You will need to stop the machine and push the batter into the blades every so often.
- Taste test to see if the sweetness and mintiness are strong enough for you. Add more add needed
- Place mixture in a bowl and using a small cookie scoop (about 1 Tbsp worth) make small round balls and place a cookie sheet lined with parchment paper.
- Chill in the freezer while you make the chocolate.
- By chilling them the melted chocolate will dry a lot quicker, giving you a nice even coat.
Chocolate coating:
Ensure all utensils and the bowl is dry before the ingredients are added as water can cause the mix to separate.
- Melt the cacao butter. Click (here) to learn a quick trick.
- In a high-speed blender combine the cacao butter, powder, sweetener, lecithin, and vanilla. Blend until smooth.
- Lecithin is optional but helps with smoothness.
- The chocolate will firm up fairly quickly as the cacao butter returns to room temperature.
Assembly:
Prepare Your Workstation
- It is best to have everything ready before you begin dipping.
- Place your bowl of chocolate at your clean workstation and set out your dipping tools or dinner forks.
- Cover a baking sheet with a clean piece of parchment paper for placing the finished candies on.
- Keep your truffles or soft fillings in the refrigerator until right before you are ready to use them.
Dip the Centers in the Prepared Chocolate
- Slide the edge of your fork or dipping tool under the truffle or candy center, and lift it up gently. Drop the truffle into the melted chocolate and push it just under the surface of the chocolate.
- Lift it out of the chocolate with the fork, and tap the fork several times against the side of the bowl. Slide the bottom of the fork over the lip of the bowl to remove excess chocolate from the bottom of the candy.
- Place the fork over the prepared baking sheet, and tilt the fork so the edge of the truffle touches the sheet. Smoothly slide the fork out from under the truffle.
- If you are adding decorations or garnishes to your candies, do it now, while the chocolate is still wet.
- Repeat the process with the remaining centers and chocolate.
Trim and Store the Candies
- Once the chocolate has set, you might notice a small pool of chocolate forming “feet” at the bottom of your truffles. If desired, you can trim them with a small sharp paring knife.
- Wear gloves to avoid getting fingerprints on your candies, and place them on a flat surface. Grip the candy in one hand, and use the paring knife to press down on the excess chocolate and cut it off in short clean strokes.
- Trimming the candies is purely an aesthetic decision, and you can certainly skip this step if desired.
- Store the candies in an airtight container in the refrigerator for up to 2 weeks.
The Institute of Culinary Ingredients™
- To learn more about maple syrup by clicking (here).
- To learn more about Yacon syrup by clicking (here).
- What is raw cacao powder?
- For tips on working with raw cacao butter, click (here).
- What is Himalayan pink salt and does it really matter? Click (here) to read more about it.
- Is coconut butter the same as coconut oil? Click (here) to find out.
- Why I use lecithin… click (here) to read about it.
© AmieSue.com
Tags: Dairy Free, Gluten Free, Refined Sugar Free, Soy Free, Vegan


Hi, It’s very hard to get hold of cocoa butter in my country. When you can it’s very expensive. $24 for an 8oz jar. Is there a substitute?
Thank you,
Mary
Hi Mary,
Not that I am aware of… as far as raw chocolate goes. The raw cacao (chocolate) butter is the hardening agent, key ingredients to making a hardening chocolate in this recipe… not to mention the chocolate flavor. amie sue
Thanks Amie-Sue. It’s getting better here but is still really hard to get some things. We’re a small country so I guess that’s a minus in some situations. I love your site and all your amazing recipes! Great job :)
Good morning Mary,
I understand that it can be hard to get certain ingredients. I live in the states and there have been times that I can’t even get these products locally and have to order them. Times are slowly changing and things will become more readily available in time, I just I just have to be patient. :) Have a wonderful day, amie sue
Dear Amie-Sue, thank you for your great recipes and tips you are giving to us. I would like to prepare this truffles but I can not get the mint extract. Could I use fresh mint? How much would you suggest?
Have a great day,
Diana
Hello Diana,
Your welcome :) You can use fresh mint instead. 1 tablespoon = 1/4 cup fresh mint, chopped …. so I would start with maybe 2 Tbsp worth and go from there. It will depend on how strong you like the flavor. Have a wonderful evening. amie sue
Thank you Amie-Sue, I will try so. Big hug, Diana
Hi can the hardening chocolate be re melted if need be?
I haven’t had the need to try it Miranda. If you try it, I suggest making sure all your bowls / utensils are dry… water and moisture can make chocolate seize, which then there is no point of return. Also melt it slowly and keep stirring it. If you give it a try keep me posted. I would love to know. :) Blessings, amie sue
Hi Amie-Sue,
I’ve only just got around to trying the chocolate recipe but had a total disaster! It has turned out like a grainy ganache, not like chocolate at all. Any ideas what may have gone wrong?
It will take some trouble shooting to find out since I am not there to see it and your process. First off, can you tell what type of blender you are using? Did you use raw cacao and the brand please? How long did you blend it? Let’s start there. I have made this recipe over 100 x (no exaggeration, made it for part of my business) and never had a batch get grainy. Let me know and I will work with you. Blessings and happy holidays! amie sue