Cake Pop Christmas Tree

 Add to favorites
 ~ raw, vegan, gluten-free, grain-free ~
I can’t think of anything more rewarding than being able to express myself to others through food. It allows me to exercise my imagination, experiment with my talents, freeing my creativity; these things, to me, are truly the windows of my soul.
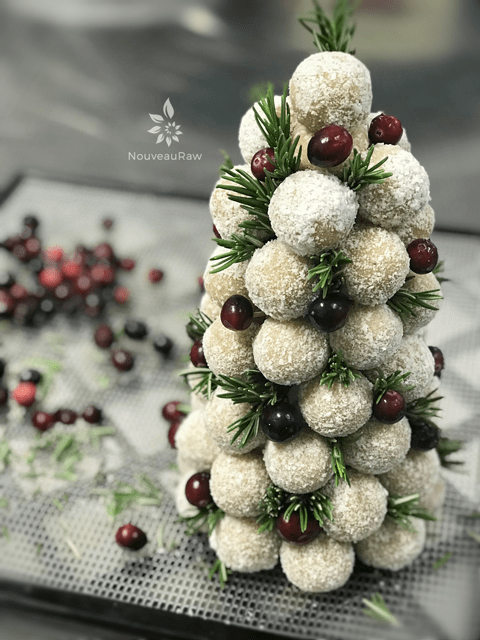
Ready to make a fun, delicious, nutritious, and festive statement? I am here to show you how I made this simple yet stunning centerpiece. What I find exciting about this presentation is that you can use so many different colors and flavors of raw dough balls.
I have some quick tips that I want to share with you before you get started, so please take a few minutes to read through this post. There’s a purpose for all that I share, in the same sense that I don’t like food void of nutrients, I don’t like words void of purpose. :) Though my husband might beg to differ… he says I am “wordy” when I talk. lol Coming from a girl that used to be deathly shy to talk to people, I will take that as a compliment.
Be sure to buy more toothpicks than you think you need. Better to have too many than not enough. I ran out halfway through…. fourteen miles and sixty minutes later… I was back in business. Apparently, I needed a break; I just didn’t know it. Hehe, It’s all about how you look at it.
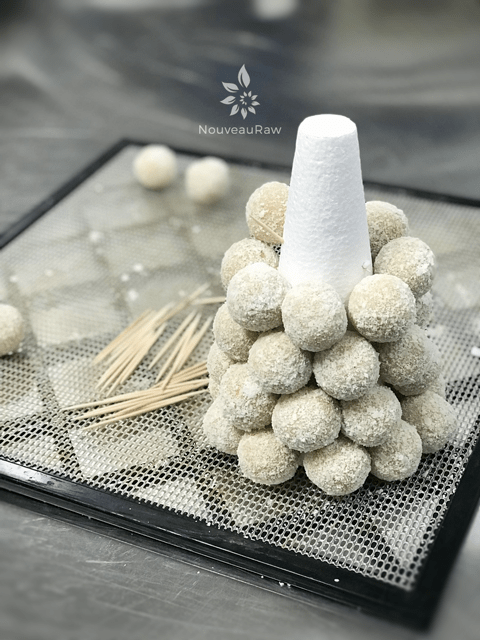
For the base of the tree, I used a styrofoam cone which can be found in most craft supply stores. I recommend the 6 or 8 inches tall cones. The cones are available larger, but I fear the weight of the balls would start to buckle underneath one another. If you feel uneasy about food touching the styrofoam, wrap the cone with plastic wrap or parchment paper. It will take a little work to do so… it’s your call.
If you plan on transporting the tree tower to another location, I would like to suggest that you hold off on adding the last two top layers of lemon bombs. This way you’ll be able to grip the top to stabilize the tower when you move it. Then when you reach your destination, complete the tree. While driving with the tree, I would recommend that someone holds the plate that the cone is sitting on, with the other hand holding the top. Use your arms like suspension, so it doesn’t get jostled around.
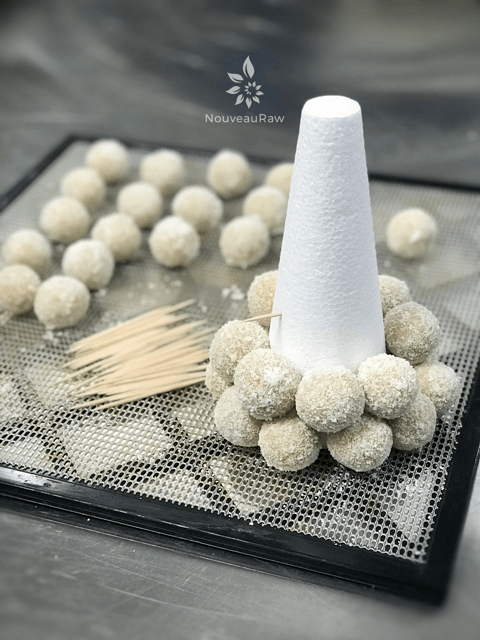
Another helpful tip is to make sure that you poke the toothpick into the cone form, followed by the cake pop. Don’t put the toothpick in the cake pop and then try to push it into the cone. You will dent the cake pop. You will need to start at the bottom and work your way to the top. After I did the two bottom rows, I started to slant the toothpick upward to better hold the cake pop. Be careful that you don’t stab yourself… toothpicks are sharp. There are a LOT of toothpicks going into that foam cone… so if you meet resistance when trying to push it in, pull it out and go at a different angle.
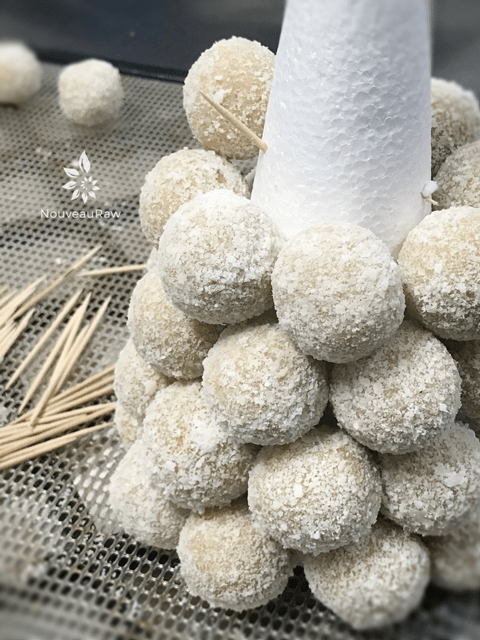
Don’t worry if you see blank spaces between the balls. Do your best to keep them all touching, just don’t overcrowd them. You will be poking cranberries and Rosemary into those blank spots. Speaking of which… when adding the cranberries, don’t overwhelm the tree with them. As you are placing them, stand back and look at the tree to make sure you are evenly dispersing the red color around the tree. Same with the Rosemary. You want to create a balance of colors so it is pleasing to the eye.
 Ingredients:
Yields 60 (1 level Tbsp / 18 g)
- 2 cups (370 g) cashews, soaked 2+ hours
- 1 1/2 cups (155 g) raw almond flour
- 1 1/2 cups (120 g) dried shredded coconut, powdered
- 1/3 cup (40 g) raw coconut flour (bought store)
- 1/4 tsp (2 g) Himalayan pink salt
-
3/4 cup (222 g) maple syrup
-
1/4 cup (65 g) lemon Juice
-
2 tsp (8 g) vanilla extract
-
2 Tbsp (10 g) lemon zest
Decorating:
Preparation:
- Soak the cashews a few hours before starting the recipe.
- Once ready to use them be sure to drain and rinse them.
- Soaking will soften them for blending and mouthfeel purposes.
- In the food processor, fitted with the “S” blade, combine the almond flour, powdered shredded coconut, coconut flour, and salt. Process until everything is well incorporated.
- I used my Magic Bullet to powder the dried coconut. You can also use a spice grinder or a “Dry” blender carafe.
- Add the cashews, maple syrup, lemon juice, vanilla, and zest. Process until it becomes a thick and cream-like batter.
- Tip: Zest the lemon before you juice it, much easier!
- With a cookie scoop, scoop out the batter and level it off.
- Plop into the palm of your hands and roll into a ball shape.
- Place the powdered coconut in a bowl, place each ball, one at a time in the bowl, and shake the bowl in a circular fashion to coat the ball.
- Place each ball on the mesh sheet that comes with the dehydrator.
- Dehydrate at 145 degrees (F) for 1 hour, then reduce to 115 degrees (F) and dry for roughly 4 hours.
- If you’re not ready to make the tree, store it in an air-tight container in the fridge or on the countertop for 5-7 days.
Building the tree:
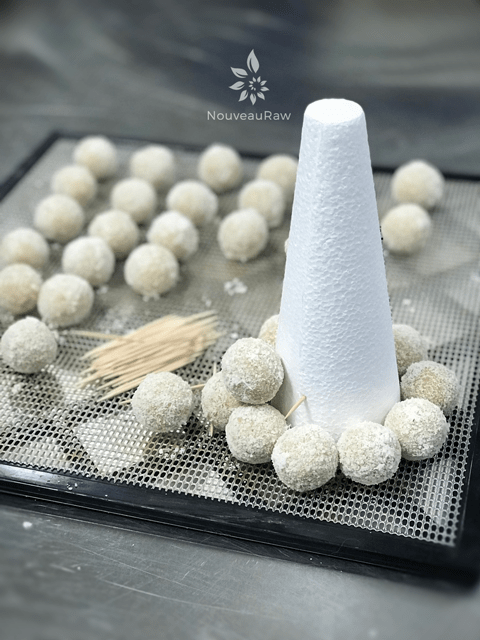
- Place the 8″ foam cone form on a small plate or your presentation vessel.
- Transferring the completed tree will be tricky, so it’s best to build the tree on the vessel that you want to present it on.
- Place one of one the lemon bombs at the base and gauge where the middle of the ball is (between the plate and the top of the ball.)
- Poke the toothpick into the styrofoam at that halfway mark. Leave about 1/2″ sticking out.
- Slide the ball onto the toothpick. The ball should be resting lightly on the plate.
- Do not use cheap toothpicks that splinter easily.
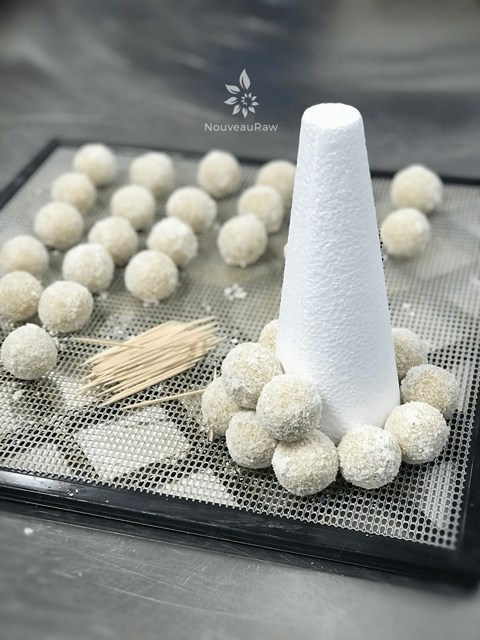
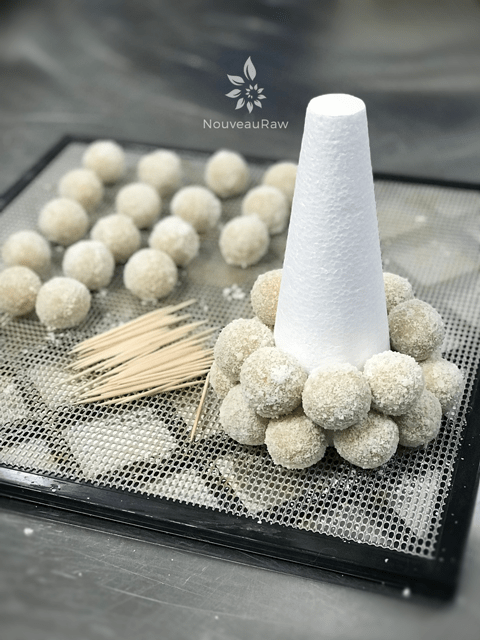
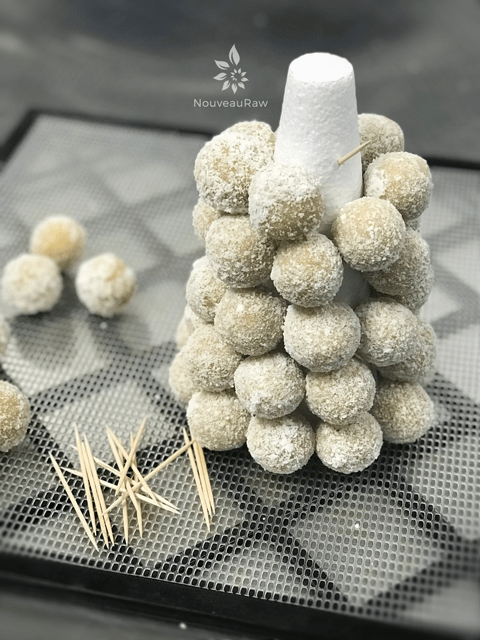
- Repeat the process as you go around the base of the cone.
- The balls should be touching each other but not squished.
- As you work up the cone, stager the lemon bombs so you don’t create vertical columns.
- After the cone is covered in lemon bombs, fill in any gaps with fresh cranberries.
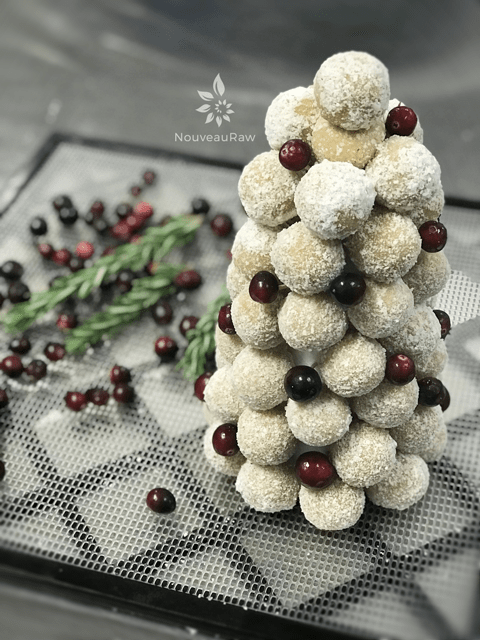
- Use the same technique of poking the toothpick in, then slide the cranberry on to it.
- The placement of the cranberries and rosemary should be random and not patterned.
- Stand back every once in a while and look at the tree…and decide where more or less color is needed.
- Once you have placed all the cranberries that you want, poke fresh rosemary in various spots.
- You can make the donut tree overnight or up to 8 hours ahead; just wrap gently with plastic wrap and refrigerate.
- This can also be frozen for up to a month. Make sure it is well protected from freezer odors.
© AmieSue.com
Tags: Dairy Free, Dehydrated, Gluten Free, Grain free, Refined Sugar Free, Soy Free, Vegan


Hi Amie Sue. Thanks for all the incredible recipes! I have a question though. When printing is there a way to print w/o all the pictures? Previously there was a key that let you print the words only but I don’t see that option any more. As much as I’d love to print all of it, it unfortunately takes up too much room. I already have two thick files of just your recipes!! :))
Good afternoon Sandygirl,
Yes, anything you hover over with your curse can be deleted. This goes for wording and photos. Give it a try and let me know. :) Blessings, amie sue
That works, thank you!!! :)
That works, thank you! :)
You bet Sandygirl :)