Nut House Granola

 Add to favorites

~ raw, vegan, gluten-free ~
There are a couple of ways that you can approach this recipe. As you will notice below in the ingredient list that I used soaked & dehydrated nuts.
I am in the habit of always soaking & dehydrating all the nuts and seeds that I bring into the house. That way they are ready for instant recipe inspirations and ready for my forever-grazing husband. :)
If this isn’t the case for you and you are starting off with nuts and seeds that haven’t been soaked yet, you can just soak them and then proceed with the recipe. It will make the batter a little bit wetter than mine was but that’s ok. It just might take longer to dehydrate.
Feel free to swap out any of the nuts or dried fruits. You can even use different sweeteners just try to stick close to the same viscosity as the ones I chose.
I love making nut-based granolas because who doesn’t love the big crunch you get from nuts? I didn’t muddy up the recipe with too many different flavored sweeteners or spices. I wanted the individual flavor of each nut to shine through.
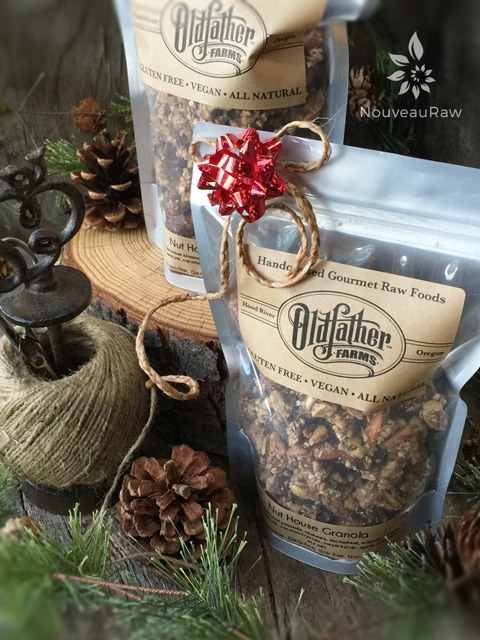
Granolas are not only great for creating ahead of time for a pantry staple, but it also makes for an excellent gift. As you can see in the photo, I made up some labels, slapped them on a bag, and prettied it up with a bow for Christmas gifts. If you don’t have fancy bags, granolas look great in mason jars or even decorated brown lunch bags.
 Ingredients:
Yields 2 trays – 12 cups dried
Preparation:
- If using soaked and dehydrated nuts;
- In a large bowl combine the buckwheat, cashews, almonds, walnuts, pecans, coconut, apricots, coconut crystals, maple syrup, cinnamon, and salt. Basically… everything. :) Mix well with your hands.
- If starting off with unsoaked nuts;
- Follow the link if you need assistance on how long to soak them for. After soaking, drain and discard the soak water. Add the remaining ingredients and mix well.
- Spread the batter out on the mesh sheets that come with the dehydrator. I just let it drop off my fingertips onto the mesh sheet. I didn’t force or spread it flat.
- Dehydrate at 145 degrees (F) for 1 hour, then reduce to 115 degrees (F) and dry for 8 hours or until thoroughly dried.
- Once cooled, store in air-tight containers.
- On the countertop, I would give it about 7 days.
- Fridge… 14 days and in the freezer… up to 3 months.
The Institute of Culinary Ingredients™
- To learn more about maple syrup by clicking (here).
- Raw Coconut Crystals add a “brown sugar” flavor to a recipe. Read about it (here).
- Why do I specify Ceylon cinnamon? Click (here) to learn why.
- What is Himalayan pink salt and does it really matter? Click (here) to read more about it.
Culinary Explanations:
- Why do I start the dehydrator at 145 degrees (F)? Click (here) to learn the reason behind this.
- When working with fresh ingredients, it is important to taste test as you build a recipe. Learn why (here).
- Don’t own a dehydrator? Learn how to use your oven (here). I do however truly believe that it is a worthwhile investment. Click (here) to learn what I use.
© AmieSue.com
Tags: Dairy Free, Dehydrated, Gluten Free, Refined Sugar Free, Soy Free


Hi Amie Sue, LOL, I LOVE the Name- “NUT HOUSE Granola” – can’t wait to make it, sounds so good !! Smiling, Lyn :]
The title fit my house-hold over the holidays. lol :)
Good day Amy… I have a question, not related with the above recipe but… I think it might interest many of your readers… I am searching for a decent, eatable, natural, without crappy stuff recipe for ginger and mint chews… would you have a magical idea :) ????
Looking forward to read you
Amyah
Good evening Amyah,
I am not sure what you mean by ginger and mint chews. Can you share a link with me to what you are referring to? Have a great evening, amie sue
Hi Amie Sue, where can I buy a bag of this granola? :)
I am not selling it Jeanine :) I made it as a Christmas gift. Have a great evening, amie sue
Thanks Amy ,making this today.
You’re welcome, Angela. Let me know how it turns out. Apron blessings! hehe amie sue
Hi Amy, when you say that would give it 7 days on the countertop, are you referring to an expiry date? If yes, why is it? Is there anything in it that can go bad or loose its flavor in such short time? I am trying to come up with a recipe for granola that I will potentially be selling so I am trying to learn as much as possible about it. Thanks in advance, Olja
Hello Olja,
When it comes to the shelf life (expiration date) of any homemade recipe, it is going to be an estimate of its ultimate freshness.
When it comes to selling a product to the public, that’s a whole different ball game.
I have a raw food manufacturing company and create an item that is the shelf stable. In order for it to be sold in stores, I had to provide an expiration date that is stamped on each bag for the consumer. In order to get that expiration date, I had to send my product off for testing (costs roughly $100 or more, depending) They have machines to test the moisture content, they look at the ingredients, how it is packaged and so forth. From there you get a certificate that states how long the product will be good for.
I hope this was helpful, amie sue
Hi Amie, thanks for getting back to me. I am aware of the process of getting certificates for items sold in the stores as I make raw cakes and energy balls and sell them in restaurants in Serbia, where I am from. I am now experimenting with other things like crackers and granolas and was surprised to see the expire date you stated. All clear now, thanks again. :) Will definitely try your recipe!
You bet.. so glad I could offer some insight. Blessings to you and your company, amie sue