- Hide menu

Matcha Green Tea and Lemon Swirl Cheesecake

LoadingFavoriteAdd to favorites

This cheesecake is my farewell gift for the Summer of 2019. Although I am dumb-smacked about how quickly time passes these days, I am looking forward to the Fall and Winter months. I love the slower pace feeling that gently moves through the air, I love the chilly weather, and I even look forward to a few snowed-in days.

That’s not to say that I didn’t enjoy our summer. We made significant headway on the new Studio (kitchen and creative play space), which you can read about (here). We still have one wall left to do, but we are patiently waiting to move the last of our manufacturing equipment to its new location to free up that wall. Even though I was tapping-my-toe-hungry to complete the studio, it allowed us some time to deal with other business and orchard work.

I also spent the summer months purging the house! Bob did too, but I was the driving force (hurricane) through it all. We were on a mission to either give, donate, or sell items that made themselves at home in dark closets, storage spaces, basements, etc. We even parted with many antiques that we have collected throughout the years. We loved these things, but they no longer held meaning. One item was a pinball machine from 1932. It was a gorgeous piece of furniture that Bob fixed, getting it into working condition, but we felt that it would have a better home in our local WAAAM Museum. That way, rather than it being tucked in our living room corner, it could now be enjoyed by the public.

A few months ago, I mentioned to our Facebook family (a private Facebook group for paid members) that I felt that I was going through a transformation… I didn’t know exactly where it was guiding me. I have and continue to remain open to what is yet ahead.

The main changes that I can put my finger on have been; purging possessions, a true cleansing of the house (not cleaning, it’s much deeper than that). My passion for creativity has shifted in a more meaningful way. I am no longer making things, just to make them; instead, everything I do and create is almost symbolic of this change taking place within me.

I have grown a GREEN thumb! I will share more about this in upcoming posts, but this also represents a massive shift that is wiggling itself out from my very core. Throughout all this, I have also been spending less time on the Internet, and being more present with those around me.

Naturally, I am about 70% introvert and 30% extrovert. I tend to be quiet (appearing shy to many), but I have no issues being around people… I love people, I love being around others, I enjoy bonding and creating friendships, I love hosting parties, etc… yet at the end of the day, I enjoy my alone family time with Bob and Milo.

I shared that because I have an online business, so it is VERY easy for me to get sucked into the Internet web. So, learning to step away and connecting with nature and people has been a little like what fuel is to fire for this transformation in me.

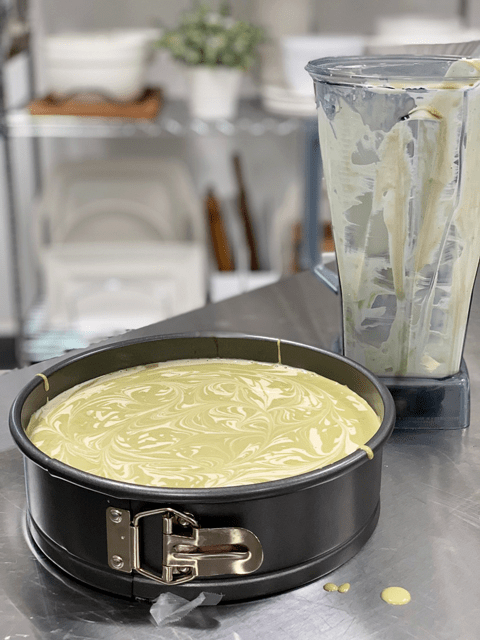
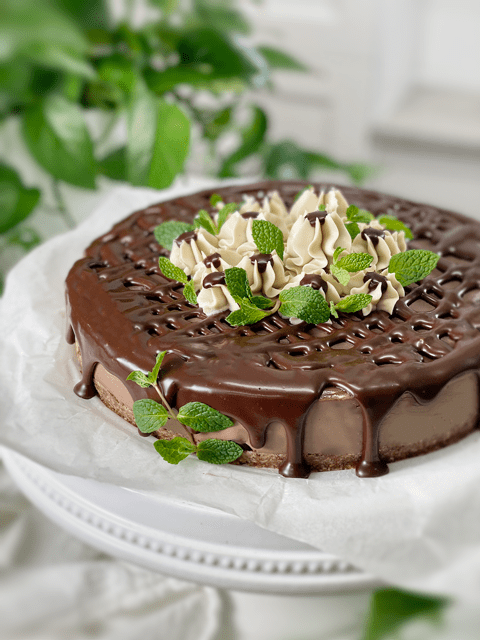
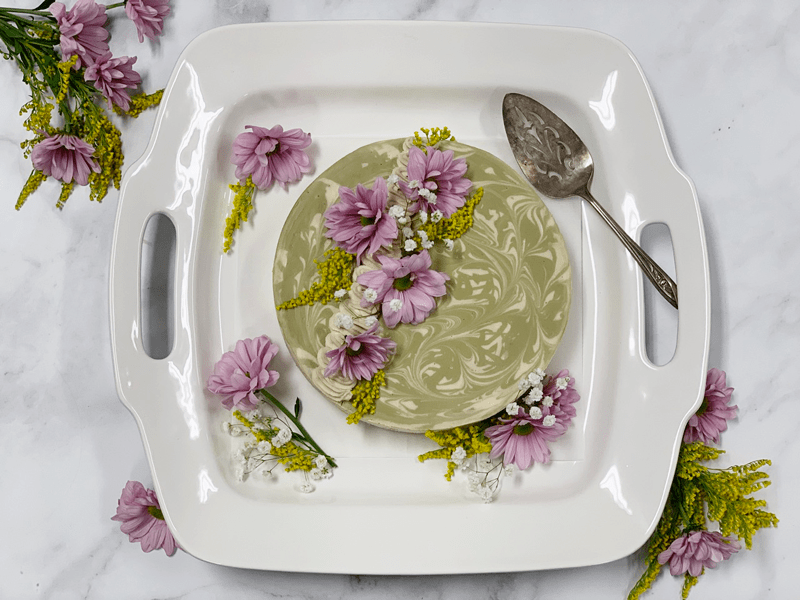
There is actually a lot to share, but if I am not careful, this post will get so long that you start drooling on your computer keyboard, and it won’t be due to your over-activated tastebuds, it will be due to sleep. Haha So, let’s chat up this cheesecake! It’s creamy delicious, stays firm at room temp (70 degrees F or below),
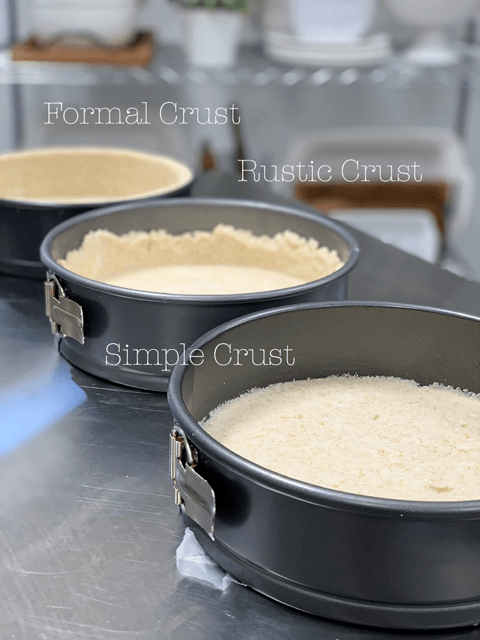
Ingredients:

9″ Springform pan

Crust:

  • 1 cups rolled gluten-free oats, soaked & dehydrated
  • 2 1/4 cup shredded coconut
  • 1/4 tsp Himalayan pink salt
  • 1/2 tsp liquid stevia
  • 1/4 cup coconut butter, softened or 2 Tbsp melted coconut oil
  • 1/2 cup water
  • 2 Tbsp maple syrup
Filling:

Add-ins (see below)

  • 1st batter – add 4 more Tbsp lemon juice
  • 2nd batter – add  1.5 Tbsp matcha powder

Kiwi Agar Decoration

  • 1 cup diced kiwi, skins removed
  • 1 cup water
  • 2 Tbsp maple syrup
  • 2 tsp matcha powder
  • 1 Tbsp agar powder

Preparation:

Crust:
  1. Assemble a Springform pan with the bottom facing up, the opposite way from how it comes assembled.  This technique will help you when removing the cheesecake from the pan, not having to fight with the lip. To help with the removal of the cake, wrap the base with plastic wrap… unless you plan on serving the cake on the bottom of the pan.
  2. Place the oats, coconut, and salt in the food processor, fitted with the “S” blade, and process until the coconut is broken down to a fine of a powder.  It took about 30 seconds with my machine.
  3. Add stevia, coconut oil, water, and maple syrup.  Process until the mixture sticks together when pinched.
  4. Distribute the crust evenly on the bottom of the pan, using even and gentle pressure.  If you press too hard, it might stick badly to the base of the pan, making it hard to remove slices.
    • Click (here) to see what style of crust you want to create.
  5. Set aside while you make the cheesecake batter.

Filling:

  1. Drain the soaked cashews and discard the soak water.  Place in a high-speed blender.
  2. In a high-powered blender combine the; combine the cashews, coconut milk, maple syrup, lemon juice, vanilla, stevia, and salt.
    • Due to the volume and the creamy texture that we are going after, it is important to use a high-powered blender.  It could be too taxing on a lower-end model.
    • Blend until the filling is creamy smooth.   You shouldn’t detect any grit.  If you do, keep blending.
    • This process can take 2-4 minutes, depending on the strength of the blender.  Keep your hand cupped around the base of the blender carafe to feel for warmth.  If the batter is getting too warm.  Stop the machine and let it cool.  Then proceed once cooled.
    • ***Can use canned full-fat coconut milk if you don’t have access to young Thai coconuts.
  3. With a vortex going in the blender, drizzle in the coconut oil, and then add the lecithin.  Blend just long enough to incorporate everything together.  Don’t over-process.  The batter will start to thicken.
    • What is a vortex?  Look into the container from the top and slowly increase the speed from low to high,  the batter will form a small vortex (or hole) in the center.  High-powered machines have containers that are designed to create a controlled vortex, systematically folding ingredients back to the blades for smoother blends and faster processing… instead of just spinning ingredients around, hoping they find their way to the blades.
    • If your machine isn’t powerful enough or built to do this, you may need to stop the unit often to scrape the sides down.
  4. Divide the batter in half. In one half, add the matcha powder and blend. In the other half, add more of the lemon juice and mix.
  5. Alternately pour the fillings into the premade crust and gently tap the pan on the counter to remove any air bubbles.
  6. With a skewer stick, drag it through the batter in a swirling motion.
  7. Chill in the freezer for 4-6 hours and then in the fridge for 12 hours. Or freeze overnight or until needed.
  8. Store the cheesecake in the fridge for 3-5 days or up to 3 months in the freezer.  Be sure that they are well sealed to avoid fridge odors.

Leave a Reply

Your email address will not be published. Required fields are marked *