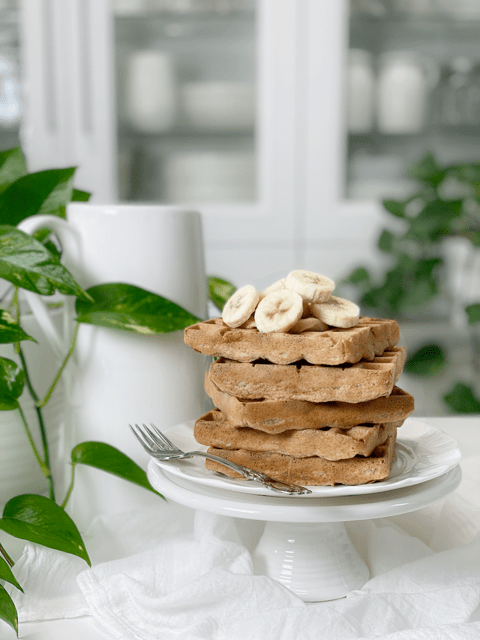
Dill and Onion Savory Waffles & Buns

 Add to favorites
~ raw, vegan, gluten-free ~
Raw bread recipes don’t have to be just plain ole’ raw breads… nope, they can be transformed into waffles and/or buns as well.
If you want to add variety to your weekly menu, think of ways where you can take one recipe and transform it into other dishes. I realize that the same flavors are there, but just changing the “scenery” on the plate can bring great excitement.
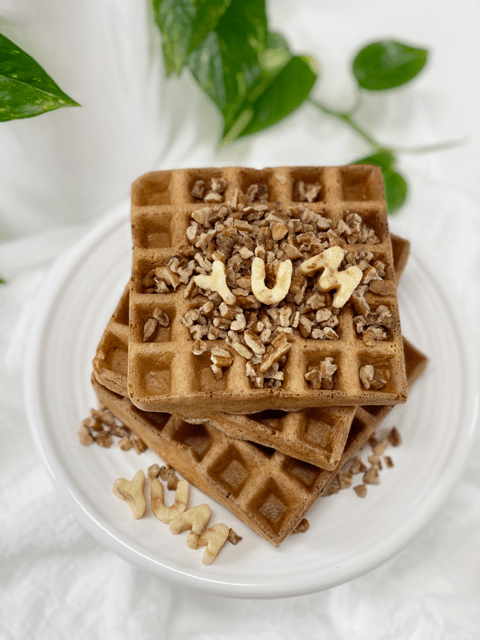
Savory Waffles
By whipping up a batch of savory waffles, you can slide them out of the breakfast category, right into the lunch or dinner menu.
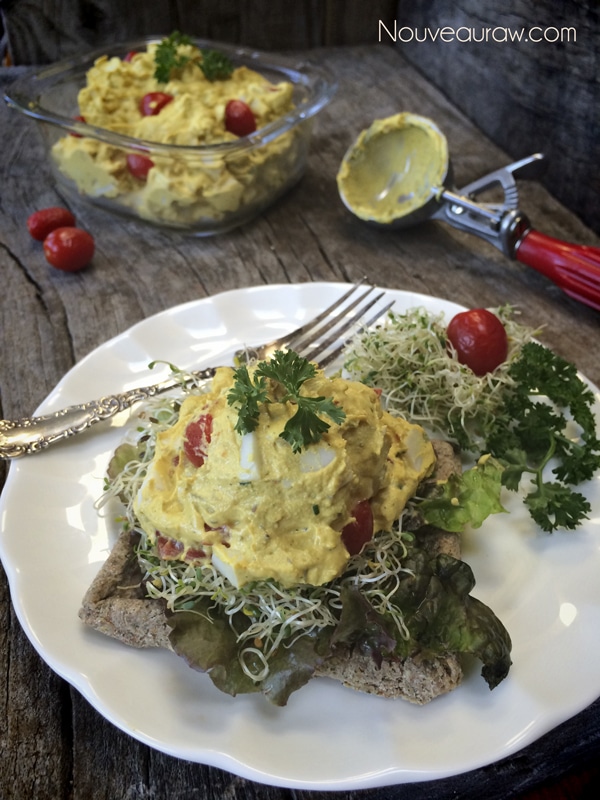
Turn your savory waffle into a sandwich by adding a dollop of Vegan Chunky “Egg-less” Salad! The dill and onion in the waffle are a great compliment to the “egg salad.” Darn near perfection, if you were to ask me. Go ahead… ask me :)
Ingredient wise, I use almond pulp as the base of this recipe. Much like I do for all my bread recipes. There is a reason for this… it gives raw bread-like recipes the right texture. I don’t recommend using anything else for that very reason. But that doesn’t mean that you can’t experiment. That’s half the fun, after all.
Making waffles like this would also be an enjoyable experience for little ones who might join you in the kitchen. You can use any waffle machine. The main thing to remember is… don’t plug it in! Hehe, Enjoy.
 Ingredients:
yields 5 waffles (2/3 cup each) or buns
Dry Ingredients:
- 1 cup almond flour (here or here)
- 2 Tbsp flax seeds, ground = 1/4 cup
- 3 Tbsp raw coconut flour
- 2 Tbsp psyllium powder
- 2 tsp onion powder
- 2 tsp dried minced onions
- 1 1/2 tsp Himalayan pink salt
- 2 tsp garlic powder
- 1 tsp fresh cracked black pepper
- 2 Tbsp + 2 tsp dried dill
Wet Ingredients:
Preparation:
- In the food processor fitted with the “S” blade, place the following ingredients: almond flour, ground flax, coconut flour, psyllium, onion powder, minced onion, salt, garlic powder, black pepper, and dill. Pulse together until combined. Place the dry ingredients in a small bowl and set aside.
- In the same food processor bowl, combine nut pulp, water, almond milk, and lemon juice.
- Blend till everything is well incorporated.
- Depending on how dry your almond pulp is, you may need to add water, so the dough sticks together nicely.
- If you this, add 1 Tbsp at a time.
- Add the dry ingredients to the wet ingredients in the food processor and mix everything well.
- To make waffles see the photos below. For buns, form the dough in the palm of your hands to the desired shape and size. Place the waffles or buns on the mesh sheet that comes with the dehydrator.
- Dehydrate at 145 degrees (F) for 1 hour. This will create a crust on the outside.
- Decrease the temperature to 115 degrees (F) and continue to dehydrate for roughly 4-6 hours. You don’t want it to be doughy, but you also don’t want the bread to dry out too much.
- Shelf life and storage: My recommendation would be to store this bread in an air-tight container, in the fridge, for 3-5 days. The more moisture that is left in your bread, the shorter the shelf life. Therefore, shelf life will vary with your drying technique. Whenever I make this bread, it never lasts very long enough to spoil. Keep in mind, the whole purpose of eating a raw diet is to eat foods at their peak of freshness, so don’t expect this bread to have a long shelf life.
- To warm the bread before eating, place it in the dehydrator set at 145 degrees for 5-10 minutes.
The Institute of Culinary Ingredients™
- What is Himalayan pink salt, and does it matter? Click (here) to read more about it.
- Is coconut butter the same as coconut oil? Click (here) to find out.
- Learn how to grind your own flaxseeds for ultimate freshness and nutrition. Click (here).
- How does psyllium work in a recipe? Learn more (here).
Culinary Explanations:
- Why do I start the dehydrator at 145 degrees (F)? Click (here) to learn the reason behind this.
- When working with fresh ingredients, it is essential to taste test as you build a recipe. Learn why (here).
- Don’t own a dehydrator? Learn how to use your oven (here). I do, however, honestly believe that it is a worthwhile investment. Click (here) to learn what I use.
The pictures do a pretty good job of explaining my process. I used 2/3 cup
of batter per waffle. This measurement may differ for you, depending on the machine.
Line the bottom of the waffle machine with plastic wrap — significant step.
Place the batter on the plastic and gently spread it out to the edges.
Place another sheet of plastic wrap on top and then close the unit.
Tip: If you use too much batter, it will ooze out the sides. If you don’t
use enough; it won’t leave the waffle impressions.
Remove the top piece of plastic wrap and then lift the waffles out by grasping
the edges of the bottom layer of plastic wrap. With a gentle hand, transfer to
the mesh sheet that comes with the dehydrator.
© AmieSue.com
Tags: Almond Pulp, Dairy Free, Dehydrated, Gluten Free, Nut Pulp, Refined Sugar Free, Soy Free, sugar free, Vegan


Brilliant! You are such a raw food genius. I appreciate all the work and trial and errors you put into making these recipes. Can’t wait to try it.
Thank you Alice, that means a lot. :) I hope you enjoy the recipe. Have a wonderful day, amie sue