Chocolate Fennel Tootsie Chews

 Add to favorites

~ raw, vegan, gluten-free, nut-free ~
For a taste of the unexpected, you must try these Chocolate Fennel Tootsie Chews. The distinctive flavor of black licorice is usually associated with tough, chewy candy that is part savory and part sweet. But there’s so much more to it, and it’s time to change things up a bit.
There are three spices that offer up a strong comparison to the commercially made black licorice, and that is; anise seeds, fennel, and star anise. Anise has an earthy, almost spicy character. Fennel has a crisp, bright taste, and star anise has a delicate sweetness.
Right now, I am hooked on grinding fennel seeds as needed for each batch. The aroma that fills the air during this process almost transcends me… somewhere, not sure where, but it’s a good place! How do I know? Because it floods my body with a warm glow, my eyes close and disappear in my head, and a huge smile overtakes my face. I have learned that they make a black licorice fragrance oil… I NEED this, not WANT… NEED! hehe
Much to my surprise fennel seed has a very sophisticated and complex flavor profile that “marries” well chocolate. You want it to be dark chocolate which is perfect because as you know, raw cacao is as dark as it comes. On its own, it is very bitter and in my opinion, inedible. So we want to sweeten things up (insert dates) making sure that we don’t tip the scales, causing it to become too sweet. Otherwise, we’ll just overwhelm the fennel. It’s all about balance.
A helpful tip when creating these candies is to use “dry” date paste. I know that sounds a bit confusing so let me explain. When creating the dates paste, use the least amount of water needed when getting it to that creamy smooth texture. I provided a link below on how I make my date paste, please review it. I mentioned above that we want the date paste creamy smooth. There is a reason.. if the date paste has bits of chunks in it, the batter will clog up the piping tip when making the candy.
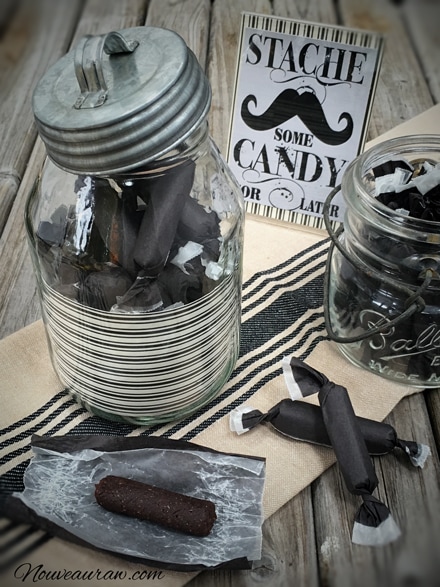
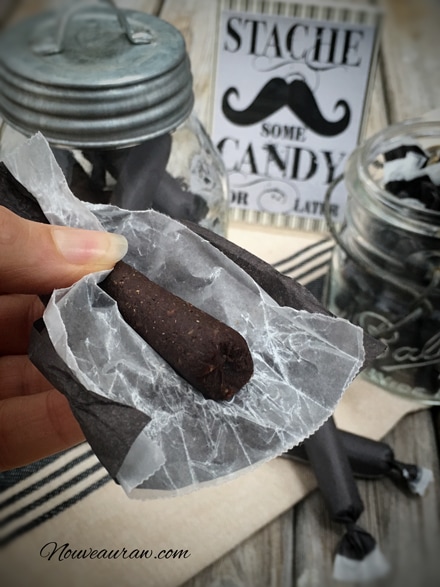
For packaging ideas, I used hinged clamshell containers online or at any local restaurant store. Twelve candies fit perfectly in them. To wrap the candies, I used brown wax paper (not parchment, too stiff) and tissue paper. I have wrapped over 1,000 pieces of candy this holiday, and I have learned what works the best… trust me, I am a certified wrapper now. lol
As far as tissue paper goes, you can use any color or pattern but stay away from full metallic foil papers. They don’t twist close well at all. Some tissue papers have metallic in them (as you see below), these work just fine. When using tissue paper, you will want to use a piece of wax paper on the inside of it, so the candy doesn’t stick. The tissue paper is just decorative.
 Ingredients:
Yields roughly 50 (2” piece) candy
- 3 cups date paste
- 1/2 cup raw cacao powder
- 1/4 cup +1 tsp ground fennel
- 1/2 tsp Himalayan pink salt
Preparation:
Create the candy batter:
- Remove the pits from the dates as you put them in the measuring cup.
- Be sure to inspect each date as you tear it in half to remove the pit. Mold and insect eggs can infect dried dates. I don’t mean to gross you out, you just need to be made aware of this.
- Place the date paste, cacao powder, fennel, and salt in the food processor fitted with the “S” blade. Process until it turns into a creamy paste.
Fill the piping bag:
- I used a strong silicone piping bag to handle the thickness of the batter, click (here). I used the piping tip Ateco #808.
- While holding the bag with one hand, fold down the top with the other hand to form a cuff over your hand.
- Fill the bag 1/2 full. If you overfill the bag, the excess batter may squeeze out the wrong end not to mention that you will have less control of the bag when piping.
- Close the bag by unfolding the cuff and twisting the bag closed. This forces the batter down into the bag.
- “Burping” the bag: Make sure you release any air trapped in the bag by squeezing some of the batter out of the tip into the bowl. This is called “burping” the bag.
- If you don’t remove the air bubbles, they will come out while you are piping your straight line and cause blurps and breaks. Best to create a seamless line.
Piping:
- Hold the piping bag tip about 1/4″ above the non-stick sheet, at a 22.5-degree angle, and slowly pipe the batter from one edge of the dehydrator tray to the other.
- Keep constant pressure on the piping bag as you squeeze out the paste. This will ensure an even thickness of the line.
- After each completed line, stop and retwist the piping bag, working all paste towards the tip. This will eliminate air bubbles in the bag and give you a solid grip.
- Remember: It doesn’t have to be perfect. Just have fun and if you make a mistake, scoop it up, place back in the bag and do it again.
Dehydrate & store:
- Place the tray in the dehydrator and dry at 145 degrees (F) for 1 hour, then reduce to 115 degrees (F) for 16-24 hours.
- Once cooled, cut into 2” lengths and wrap in squares of wax paper.
- I keep mine stored in the fridge for freshness, but they can be left out at room temp.
- These candy chews won’t be hard or crunchy.

Culinary Explanations:
- Why do I start the dehydrator at 145 degrees (F)? Click (here) to learn the reason behind this.
- When working with fresh ingredients, it is important to taste test as you build a recipe. Learn why (here).
- Don’t own a dehydrator? Learn how to use your oven (here). I do however truly believe that it is a worthwhile investment. Click (here) to learn what I use.
© AmieSue.com
Tags: Dairy Free, Dehydrated, Gluten Free, Nut Free, Refined Sugar Free, Soy Free, Vegan


 Add to favorites
 Ingredients: