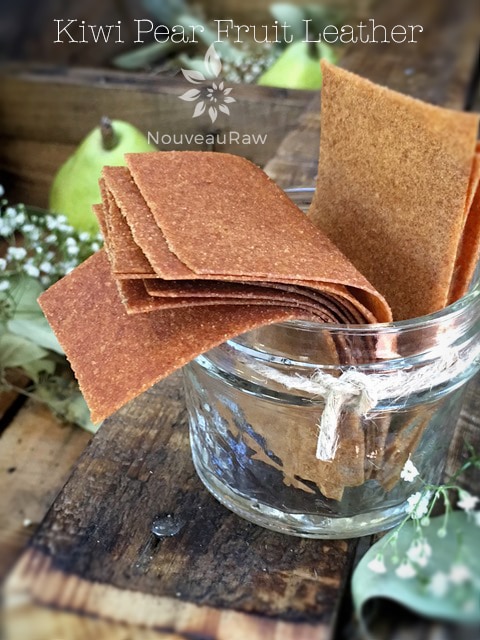
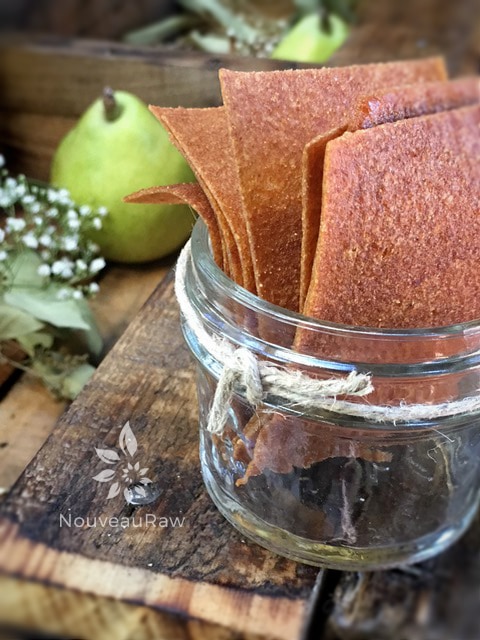
Kiwi Pear Fruit Leather

 Add to favorites

~ raw, vegan, gluten-free, nut-free ~
I did a little research on the health benefits of kiwi fruit. I had no idea how much goodness was packed into such a vibrant colored, little fruit!
- Kiwi fruits are rich in many Vitamins, flavonoids, and minerals. In particular, they contain a high amount of Vitamin C (more than oranges), as much potassium as bananas, and a good amount of beta-carotene.
- Kiwi fruits contain a remarkable amount of Vitamin C, E, and A. Vitamin C is a water-soluble antioxidant that has been proven to protect our body from free radicals, dramatically improving the health of individuals who consumed it regularly against all kinds of disease, from cardiovascular problems to cancer and obesity.
- The high content of dietary fiber helps improving diseases such as diabetes, by controlling sugar levels, and colon cancer, since fiber binds to toxic compounds in the colon and helps us expel them.
- Fiber has also been proven to reduce cholesterol levels, improving the conditions of patients with cardiovascular diseases, and lowering the probability of heart attacks.
- Vitamin E has been proven to have similar effects, but is fat-soluble and thus is complimentary to Vitamin C in its functions. Kiwi fruits contain both these vitamins in high amount, which help protect our body against free radicals from all fronts.
Kiwi fruit looks like a fuzzy brown egg. You can eat it with or without the skin. I, personally, don’t like it with the skin on. They are a beautiful fruit and should be greatly admired. As you bite into a kiwi or slice it in half, you will reach a velvety bright green flesh that is sprinkled with a ring of tiny, edible black seeds. The taste will vary from fruit to fruit, going from tart to sweet. It can be described as a combination of other fruits, such as strawberries, nectarines, and melons. It blends well with other fruit, and that is why I was so excited to create this recipe.
To make the most favorable fruit leather, you need to start with very ripe kiwis! Trust me on this. For the sweetest, fullest flavor, choose plump, fragrant kiwi fruit that yields to gentle pressure, like ripe peaches. The unripe fruit has a hard-core and a tart, astringent taste. If you can’t find ripe kiwi, you can ripen them for a few days at home. To ripen, leave them at room temperature away from heat and direct sunlight. Once ripe, store it away from other fruit, as it is very sensitive to the ethylene gas they emit. Well, it’s time. Time to get busy in the kitchen. Many blessings and I hope you enjoy the recipe. amie sue
 Ingredients:
3 1/4 cups puree
- 3 cups diced kiwi, peeled
- 3 cups diced pears, peeled and cored
- 1/2 tsp ground Ceylon cinnamon
Preparation:
- Select RIPE or overly ripe fruit that has reached a peak in color, texture, and flavor.
- Puree the fruit and ground cinnamon, in the blender or food processor until smooth.
- Taste and sweeten more if needed. Keep in mind that flavors will intensify as they dehydrate.
- When adding a sweetener do so a little at a time, and reblend, tasting until it is at the desired taste.
- It is best to use a liquid type sweetener. Don’t use granulated sugar because it tends to change the texture.
- Spread the fruit puree on teflex sheets that come with your dehydrator. Pour the puree to create an even depth of 1/8 to 1/4 inch. If you don’t have teflex sheets for the trays, you can line your trays with plastic wrap or parchment paper. Do not use wax paper or aluminum foil.
- Lightly coat the food dehydrator plastic sheets or wrap with a cooking spray, I use coconut oil that comes in a spray.
- When spreading the puree on the liner, allow about an inch of space between the mixture and the outside edge. The fruit leather mixture will spread out as it dries, so it needs a little room to allow for this expansion.
- Be sure to spread the puree evenly on your drying tray. When spreading the puree mixture, try tilting and shaking the tray to help it distribute more evenly. Also, it is a good idea to rotate your trays throughout the drying period. This will help assure that the leathers dry evenly.
- Dehydrate the fruit leather at 145 degrees (F) for 1 hour, reduce temp to 115 degrees (F) and continue drying for about 16 (+/-) hours. The finished consistency should be pliable and easy to roll.
- Check for dark spots on top of the fruit leather. If dark spots can be seen it is a sign that the fruit leather is not completely dry.
- Press down on the fruit leather with a finger. If no indentation is visible or if it is no longer tacky to the touch, the fruit leather is dry and can be removed from the dehydrator.
- Peel the leather from the dehydrator trays or parchment paper. If it peels away easily and holds its shape after peeling, it is dry. If it is still sticking or loses its shape after peeling, it needs further drying.
- Under-dried fruit leather will not keep; it will mold. Over-dried fruit leather will become hard and crack, although it will still be edible and will keep for a long time
- Storage: To store the finished fruit leather…
- Allow the leather to cool before wrapping up to avoid moisture from forming, thus giving it a breeding ground for molds.
- Roll them up and wrap them tightly with plastic wrap. Click (here) to see photos of how I wrap them.
- Place in an air-tight container, and store in a dry, dark place. (Light will cause the fruit leather to discolor.)
- The fruit leather will keep at room temperature for one month, or in a freezer for up to one year.
Culinary Explanations:
- Why do I start the dehydrator at 145 degrees (F)? Click (here) to learn the reason behind this.
- When working with fresh ingredients, it is important to taste test as you build a recipe. Learn why (here).
- Don’t own a dehydrator? Learn how to use your oven (here). I do however truly believe that it is a worthwhile investment. Click (here) to learn what I use.
© AmieSue.com
Tags: Dairy Free, Gluten Free, Nut Free, Refined Sugar Free, Soy Free, sugar free, Vegan


 Add to favorites
 Ingredients:
hey amie sue, i’m trying fruit leathers for the first time. i’m doing this one and the banana mango one. i just hope i make it til they’re done, i keep nibbling they are so good! tastes just like the fruit roll ups i ate as a kid. :) my question is: would it be helpful, or just unnecessary to remove the leathers from the sheets once they are solid enough, and transfer them to the trays (like u do for crackers)? thanks a bunch!
Good morning Rhonda,
I so hear you. :) There were many purees where I just wanted to insert a straw into the blender craft and call it a smoothie. hehe You can easily flip the leather onto the mesh screen. It might to speed up the dry time but it’s not necessary. I hope you enjoy the end product! amie sue
what would happen if the pear skins were in there?
Not to sure Nikki. I haven’t tried it. If you do, I would just make sure to use organic kiwis, wash them well, and blend them really well. Keep me posted if you give it a try. I have known people who eat the skin, enjoying the fruit like an apple, but I was never fond of the flavor and texture of the skin.
Have a blessed day, amie sue
Oh i meant pear skins actually not kiwi skins – kiwi skins would be too fibrous for me! i looked online and sounds like the pear skins wont affect much. Thanks for the lovely raw food resource!
Yep, just caught that and already had responded. lol Sorry about that. :) Enjoy and keep me posted. amie sue
oooh I so read your message wrong. That’s what happens when I try to answer comments right when I step out of bed. lol I am sorry Nikki. As you already found… pear skins are just fine to do in fruit leathers. :) Blessings, amie sue
no worries. thanks for your responses! i am infusing the pear with thai basil as we speak :)