
Background Color

 Add to favorites
When it comes to creativity, I find that just about anything can become an “art medium.” For instance, the recipes I develop are edible pieces of art, flat pieces of fabric become three-dimensional objects, when I dabble with paint, I can literally transform a space–and now, I have houseplants to add to my artistic list. Hold on, Bob… I feel the creative bug biting!
Midsummer of 2019, I decided to create a Living Wall in our house. The idea just sprang from the depths of my core — how, where, and when flooded through my thoughts. The main issue was the fact that I didn’t have much wall space in our home due to the open floor plan and abundance of windows (not complaining). I love those features, but hanging things on the wall is challenging!
When wall space is limited, it becomes precious, and you want to use it wisely. I had one primary wall that provided enough space to hang anything of substance, but for years, tall furniture pieces covered this wall, which wasn’t very functional, but it balanced the space. It was time for a change! For the past year, Bob and I have been purging our house… every nook and cranny. It started with closets, cabinets, drawers, etc. but soon, we were addicted to lightening our load. We went from getting rid of junk drawers to large furniture pieces.
 Which brings us back around to this one huge wall that was now empty. Yep, I sold the furniture that once took up real estate space here. I wanted access to that wall, and I wanted it to be art! One evening as I was sitting there, staring at it, I got to thinking about my other passion… healthy, whole-food, plant-based recipe development. Well, if our diet was plant-based, shouldn’t our house be? I giggled to myself, loving the idea the minute I conceived it.
I decided to fill the wall with living plants. I have to admit, I was a little nervous to tell Bob. I always run such things past him because, well, he lives here too! From the time it took for the concept to leave my lips to reach his ears, he instantly said, “Yes! go for it!” I don’t know why it surprised me that he was all for the idea; he is always supportive of my crazy ideas. But that simple “yes,” was all I needed to bring the concept to fruition.
I already had plants on flat surfaces (tables, counters, floors), and I already had many hanging from the ceiling. Now it was time to research the pots I would need to hang them on the wall. I am not sure how I landed on Wallygro.com, but boy, talk about a Godsend. Their pots are incredible.
They are the most straightforward, most effective vertical wall planter that I could find on the market. Each planter is made from 100% recycled eight milk jugs, right here in the USA. Now, this is a mission I can support and feel good about!
I sat down with Bob and asked him to help me with a layout. I had a pretty good idea of what I wanted, but two heads are always better than one. We decided on a 25-plant layout. I was excited and hesitant all at once. To pay for my art installation, I continued with our purging process through the house, selling stuff online, and before I knew it, I had the funds in hand to start my Living Wall adventure.
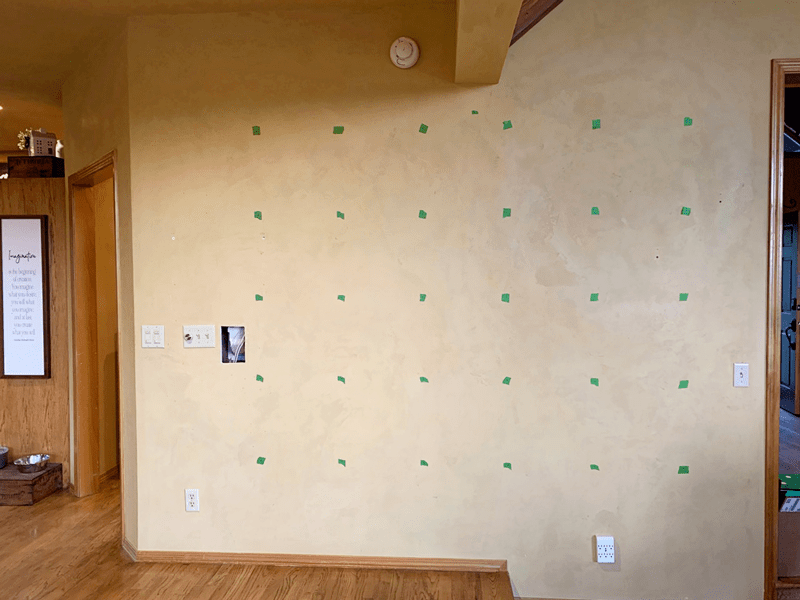
We measured and put a piece of green painter’s tape where each Wally Pot was going to go. See the hole in the wall? That is our in-wall vacuum system; we had to relocate it to the other side of the wall so the hose wouldn’t rub against the plants. Thankfully, that was a quick fix, so we didn’t have to rethink the whole idea. Looking at all the tape marks on the wall, my heart started to race a little… that’s a lot of holes to put in the wall. We were able to find studs for most but not for all. That meant we had to place anchors in the wall. No pain, no gain… right?!
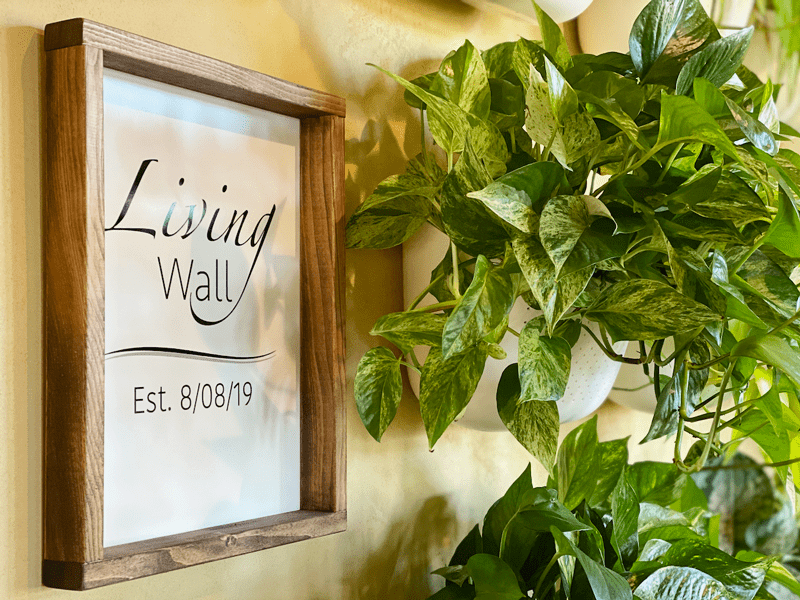
To lessen the stress load, we used a laser guide to help keep things level. That little tool is a blessing to have around. We ended up placing each pot 16″ apart from its neighbor. For layout ideas, check their site (here). Since our wall had to sit empty with green polka dots all over it, I made a sign and hung it in the center of the wall. That way, when company came over, they would see that something big was coming. It built excitement for everyone.

After placing the order for the Wally Pots, I quickly realized that I needed to find 25 plants! I knew that I wasn’t going to be able to find that many plants locally, so Bob, Milo (the wonder dog), and I made our way to Portland to shop for plants. Before leaving the house, I spent time researching what plants I wanted; now, I just had to find them. It took a few shopping excursions, but we love adventures, so we had fun with it.
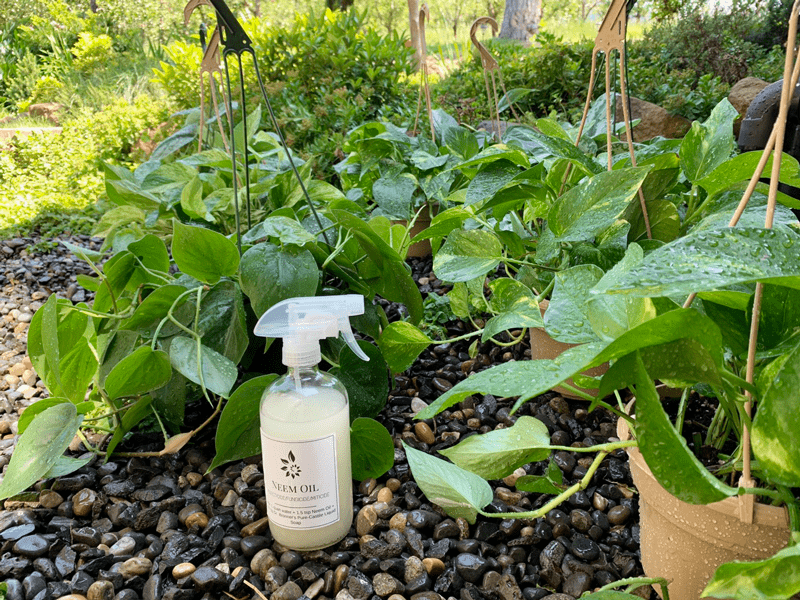
Every plant that I brought home got a thorough inspection, washing, and a neem oil treatment. The plants had their spa treatment; the potting soil was standing by, so now we just had to wait for the planters.
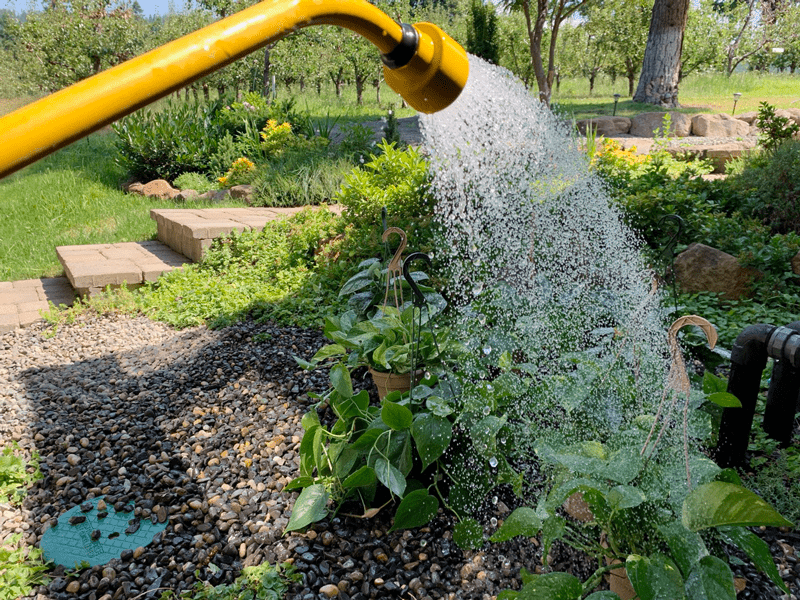
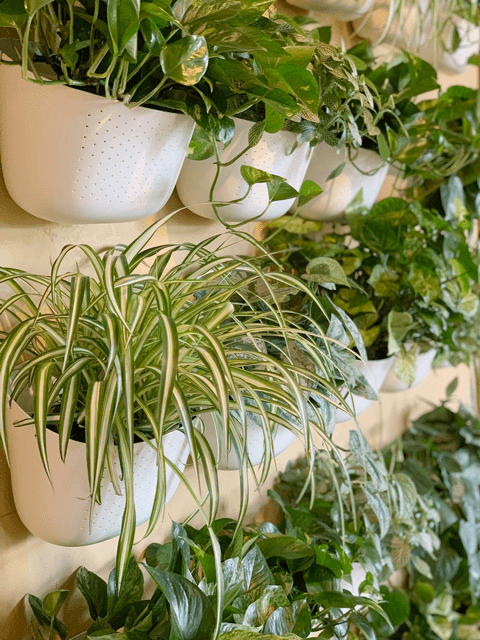
With the Wally Pots hung on the wall, all I needed to do was transplant 25 plants! I gathered all my supplies and set up two eight-foot folding tables outside near the hose where I did all the “dirty work.” Since the plants were already clean and ready to go, it took about three hours to transplant all of them. Then, all I had to do was hang the pots on their brackets, which were already in place! They pop on and off with such ease. Glorious! Glorious! Glorious!
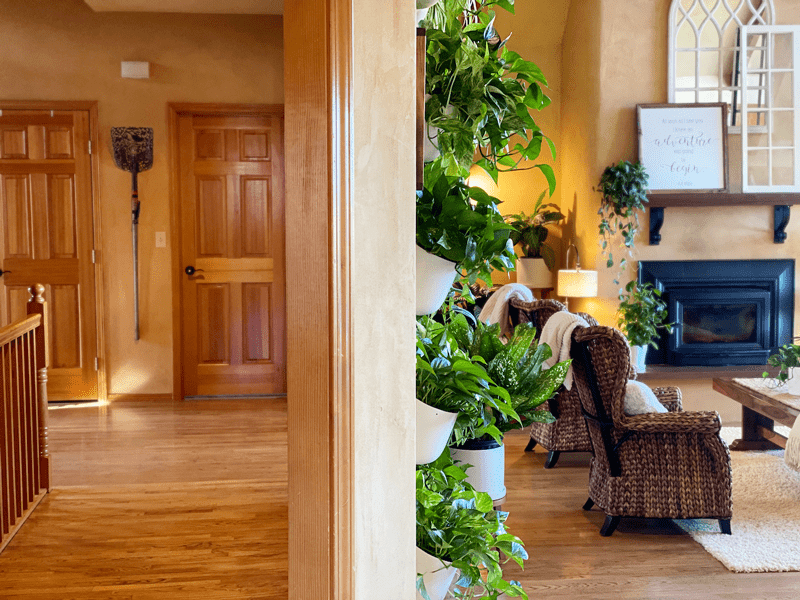
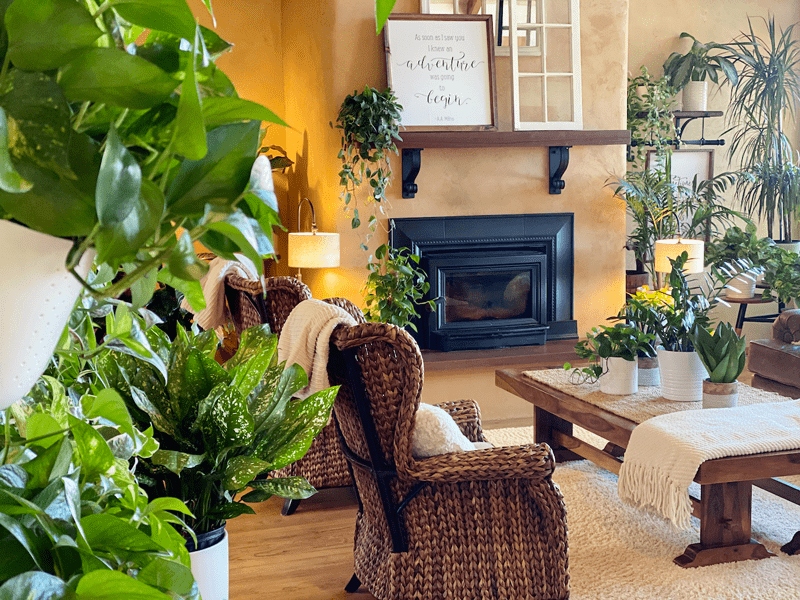
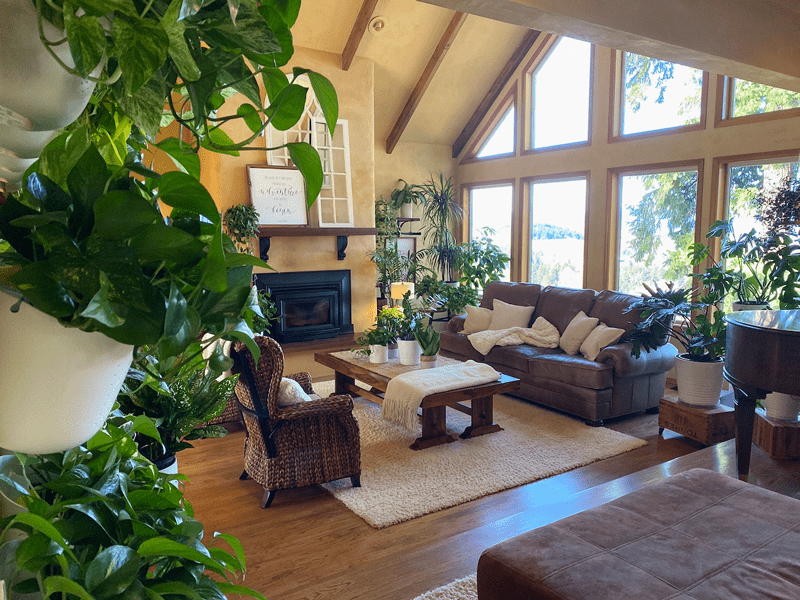
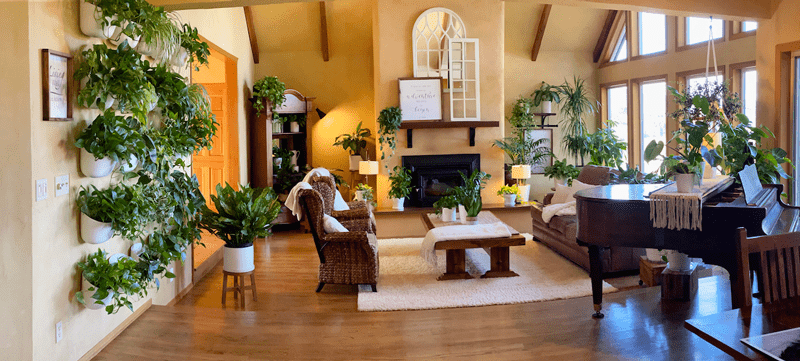
The photo above: The top floor of our house is an open floor concept (living room, dining room, kitchen, and a grand opening to the sunroom). I took this photo while standing in the kitchen. There was a large wall that separates the entryway and the living room, which is where I hung the living wall. The living wall faces a north window. I took a photo below so you can see the lighting that I am working with.
My wall was living and full of life. My WallyGro vertical garden wall acts as a natural air filter, creating a cleaner, more invigorating home environment that leads to better overall health. The plants metabolize harmful toxins such as formaldehyde, carbon monoxide, VOC’s, and benzene while releasing energizing oxygen into the air. Not many pieces of art can do that!
I’ll be honest, this wall was an investment: pots, plants, and soil… but what work of art isn’t? Every day I am in awe of the wall. I sing to it, talk to it, and brush my hands along the foliage. I take care of it, and it takes care of me!
It is effortless to care for this wall. Taking care of these 25 plants is truly a breeze.
I know this was a bit lengthy, and I hope you enjoyed reading about how I built my Living Wall. Please be sure to leave a comment below. Blessings, amie sue
Funky panoramic photo


Wher4e did you obtain your Neem Oil – brand? Reason for selecting that brand? Thanks! Never heard of it for plants before.
Your living wall is gorgeous! Would love an update post on how it’s looking a few years later…
Thank you Carol. I will see about adding some updated photos. :) amie sue
LOVE LOVE LOVE THIS PLANT WALL!!!
Thank you. It has been my favorite thing in the house since I put it up. It’s like living ART!! I appreciate the feedback. I have another one going up in my master bathroom once the remodel is over. I am excited about that one too. I have growing plant babies from propagations to create it. blessings, amie sue