Red Velvet Cake

 Add to favorites
Red Velvet Cake
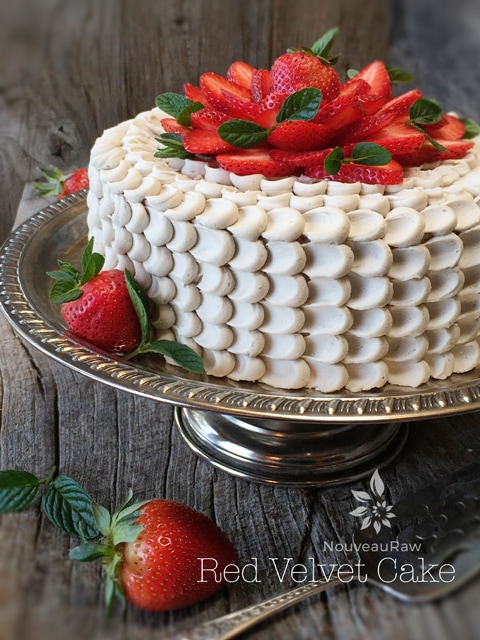
~ raw, vegan, gluten-free ~
First of all, I want to thank Kay, who presented me with a challenge, to create a red velvet cake for her upcoming birthday celebration. Happy Birthday Kay and many many blessings!
Let’s jump right in!
I just love the light and moist texture of this cake it is a beautiful contrast to most raw cakes which can be heavy and dense. Variety is good! Here’s the scoopy-doop when it comes to the end texture and moisture of this cake. Please read thoroughly because I am sharing all my tricks and experience with you. There is much to be learned.
Almond Pulp
Every batch of pulp will differ in moisture. This depends on how much of the milk you are able to squeeze from the nut bag. Therefore, you may need to adjust the amount of liquids being used in pulp recipes. If it is a really dry feeling, more moisture may need to be added. Or if the pulp is really wet, less moisture would probably be necessary.
It is also best to make sure that the pulp is unflavored and that is a step that has to be taken when creating almond milk. There is a link below that you can click on to learn more about this process if you are unfamiliar with it. BUT should your pulp already have small hints of sweetness to it, not to worry… I doubt it would be enough to affect the outcome of this cake. I don’t recommend any substitutions for the almond pulp. It is the key ingredient that helped me to create a light and airy cake batter.
Red Velvet Beets
Another key component of this cake is the beets. I used whole, pureed beets rather than just the juice and for a good reason. I tend to find that if I use just beet juice in cheesecake or cake, it causes the color to be “pretty in pink.” Nothing wrong with that if you want the dessert to be pink. But for a red velvet cake, I needed a RED color, and that prompted me to use the whole beet. Now, I know what you are thinking, use red food dye…. not on my watch. For the standard, baked Red Velvet Cake… bakers use 1 full bottle of #40 red food coloring! Want to read some stuff that will cause you to toss your food colorings? Google some more if you wish to educate yourself more on the matter. Yes, there some “natural” dye colors on the store shelves but I don’t have much luck with those when I want a really strong color.
Sweet Baby Beets
I know what you are thinking… “Amie Sue I REALLY dislike beets!” I know I know… but I am going to ask you to put a little faith in me and just give this cake a try. Why do I feel so confident? Because I am married to a man who when asked what foods he doesn’t like… He always says “BEETS” with the most wrinkled up, disgusted look on his face. Not only does the tone of his voice tell all so does the way he holds his body when he even just thinks about them. All this to say… that he enjoyed every bite of this cake that passed between his lips. Tip of the day… look for small beets, don’t use large woody ones. The small ones are sweeter in taste, and we need all the help we can get to avoid the beet flavor from shining through.
Raw Cacao Butter
This is always an interesting ingredient for me to work with. The best way to melt raw cacao butter is to grate it into uniform-sized pieces. This speeds up the melting process and helps it to melt at the same time. The part that makes it interesting to me is the fact that I have a lot of electricity in my body and it always causes the tiny flakes of cacao to literally jump out of the measuring cup and onto everything within the surrounding area. Worse than even packing peanuts, lol I tried to take a picture of the process for you, but I will be darned if the stuff didn’t jump from the bowl onto my iPhone. Seriously! Downright entertains me when I “cook” with it.
I don’t recommend skipping this ingredient either. It helps with the chocolate flavor (without affecting the color) and with the texture since it firms up a bit when chilled.
 Ingredients:
Cake:
- 2 cups (280 g) raw red beet, pureed
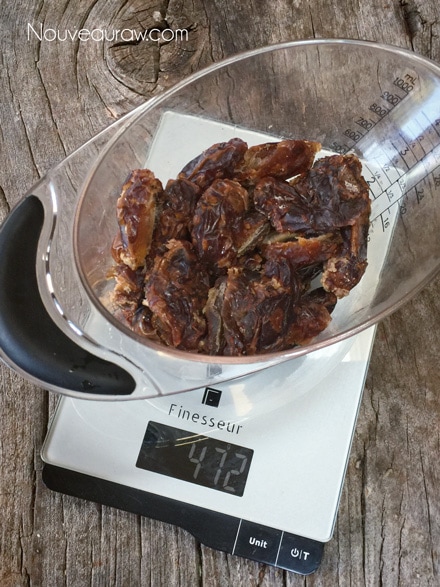
- 2 cups packed (472 g) Medjool dates, pitted
- 1/4 cup + 2 Tbsp maple syrup
- 3 Tbsp (40 g) raw cacao butter, melted
- 2 Tbsp fresh lemon juice
- 1 Tbsp pure vanilla extract
- 1/4 cup raw cacao powder
- 1/2 tsp Himalayan pink salt
- 4 cups moist, packed almond pulp
Decoration:
Preparation:
Cake:
- Beets: Wash, dry, and peel the beets. I used a potato peeler to easily remove the skins. Cut the ends off and rough chop 2 cups worth.
- Place the beets in the food processor, fitted with the “S” blade, and process until they are fully broken down to a small crumble.
- Add the dates and agave. Open the lid of the food processor and scrape down the sides, then place the dates around the perimeter of the bowl.
- If the dates are really dry, I recommend warming them up by placing them in the dehydrator at 145 degrees for roughly 15 minutes.
- I typically recommend re-hydrating them in water, but I don’t want the excess water to affect the outcome of the cake texture.
- Add the melted cacao butter, lemon juice, and vanilla. Process to a paste-like texture.
- To melt the cacao butter, grate the pieces into a bowl that can be placed in the dehydrator so it can melt.
- By grating the butter, it will melt quicker because it is all the same size.
- Add the cacao powder and salt. Process to a paste-like texture then transfer the batter to a large bowl.
- Add the almond pulp and mix well with your hands.
- I recommend gloves if you have them, so the beets don’t stain your hands. :)
- Using your hands is the best way to ensure that everything gets well mixed!
- I don’t recommend any substitutions for the pulp… it is what helps to make this cake as amazing as it is.
- Line the base of a Springform pan and press 1/2 of the batter into the pan, evenly and firmly.
- Take a paper towel and clean the edges of the inside of the pan. If red cake batter bits are stuck to the edge, and you add the white frosting, it will mark up the frosting.
- Make the frosting… I will wait for you…
- Pour 2 cups worth of frosting over the cake.
- Spread evenly, then take a paper towel and clean the edges of the pan.
- Place in the fridge to chill until the frosting is firm to the touch. This can take several hours.
- Once the frosting is firm, take the rest of the cake batter and loosely drop it around the pan, then gently press it down evenly around the pan. This will cause the least amount of disturbance to the frosting layer.
- Now place the whole cake in the freezer. It needs to be frozen in order to do the first layer of frosting which is called the “crumb layer.”
- With the cake now frozen, take an offset spatula and spread a thin coat of frosting on the top and sides of the cake.
- Don’t worry if you disturb the cake and get a few crumbs in it. We will be covering over it.
- To learn about frosting a cake, please click (here).
 Petal technique:
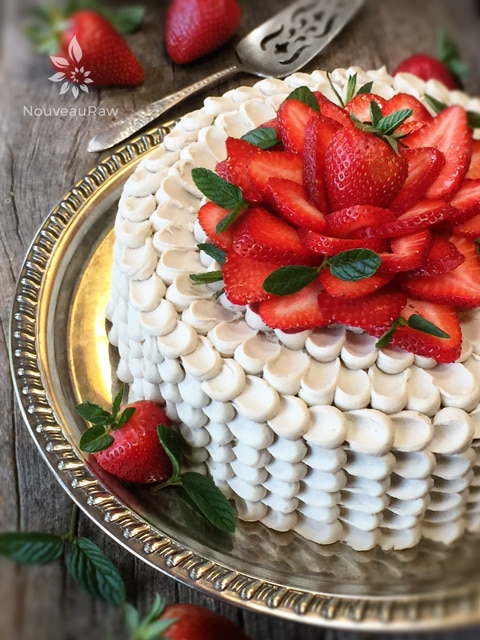
- The Petal Technique uses a round tip in your piping bag and a small spatula or small spoon to create the effect. It’s a simple process, just time-consuming. It took me 30 minutes to make this cake.
- I used the #12 circular piping tip.
- Pipe a vertical line of icing dots.
- Place the offset spatula or a small spoon tip in the middle of the dot, press down, and drag.
- I am a lefty, so I naturally drag the spoon to the left… if it is more natural for you to go to the right, then do so.
- Continue around the cake, one vertical row at a time. This will take a little time, but it is well worth it!
- If the frosting starts to get to warm in the piping bag (due to room temp or the warmth of your hand) return it to the fridge to set up a bit. I didn’t have to do this, but I can see where it might be needed if the climate or room temp is warmer than 70 degrees (F).
- On the very last row, don’t spread the dot as far as the other rows. Make sure that this last row is on the back of the cake, though it isn’t too noticeable.
Decorate:
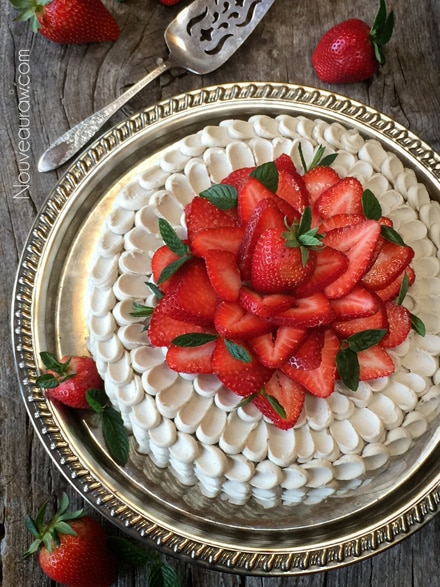
- I ran out of frosting as you will see in a photo down below… strawberries to the rescue! That was my ultimate plan from the get-go, so it all worked out perfectly.
- Remove the green stems from the strawberries and cut them into thin slices.
- Create a circle of sliced strawberries, working from the outside in. Slightly overlapping till you reach the center.
- Poke mint leaves within the strawberries and smile at your creation.
- Serve the cake when it is thawed to get the most of the texture and flavor.
Tips:
- Feel free to just swirl in the frosting on if you don’t want to do the petal technique… but I encourage you to try it, you will amaze and impress yourself, (not to mention everyone else!).
- Take pictures!
- When done taking pictures, CAREFULLY carry them to the table. As I was doing this, I sneezed… my head went one direction to miss the cake, and the cake went the opposite direction to miss the sneeze… my cake slid off the holder and plopped onto the bench of our kitchen table with a loud thud. This step is optional, don’t recommend it, but hey… if you are looking for something to test your character, go for it. Lol *slaps forehead*… OY-VEY! I looked at my smashed cake, threw my hands in the air, and looked to the sky… “NOOOOOOO!” I think every cow within 10 miles around us heard me. Then I just had to laugh. When I first met Bob, I asked him what he did or said whenever he stubbed his big toe (to me, this tells me a lot about a person). Well, this is how I respond when cakes go a-flying! Lol, How would you respond?
Now that you know what it looks like… let me show you how to make it.

Weighing out the beets….
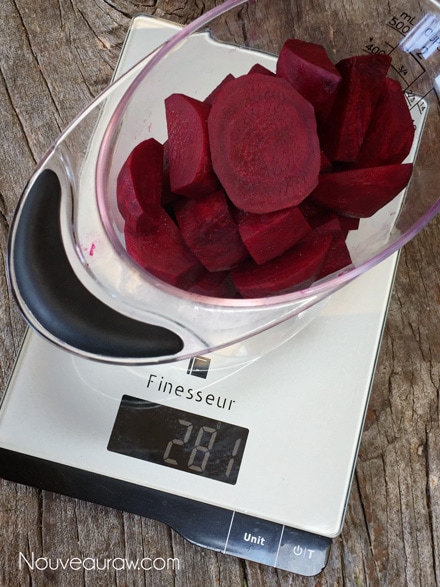
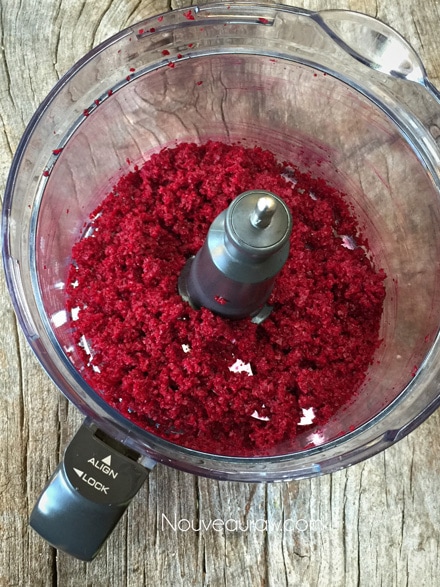
This is the texture of the beets after I processed them.
Weighing out the pitted Medjool dates…
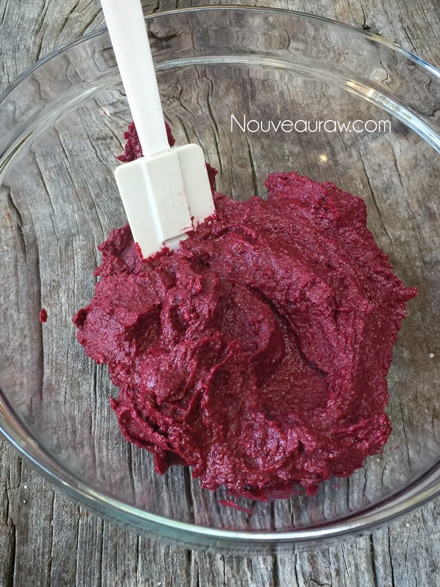
This is the texture after blending everything but the pulp it in.
Divide the batter and press one section in the base of the pan.
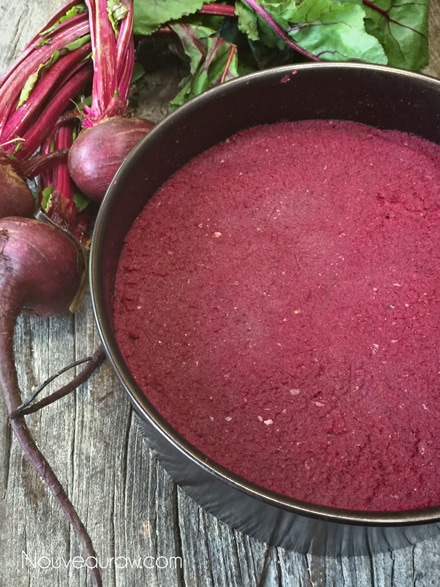
Pour 2 cups of liquid frosting on top and chill for a few hours.
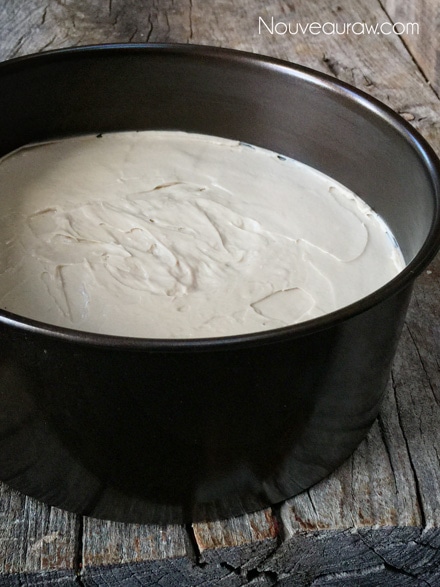
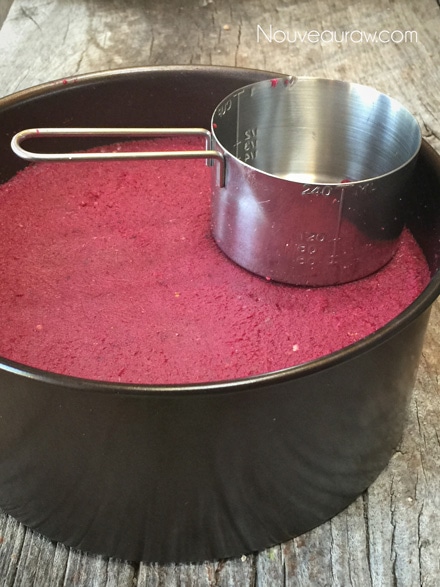
After the surface hardens, add the remaining cake batter on top.
I used a measuring cup to smooth the surface.
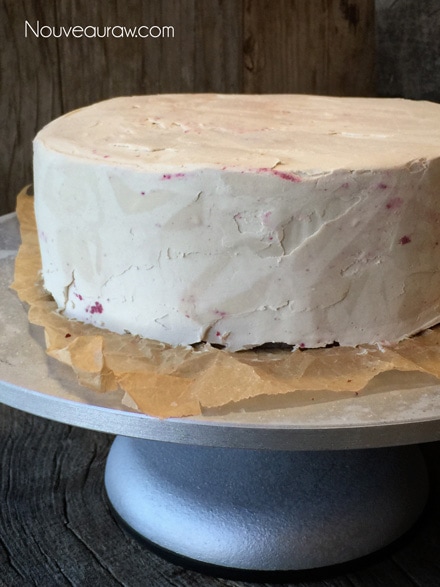
Place in the freezer to harden the cake so you can frost it.
Either frost as you would a typical cake or do a thin “crumb
coat” layer before doing the petal technique.
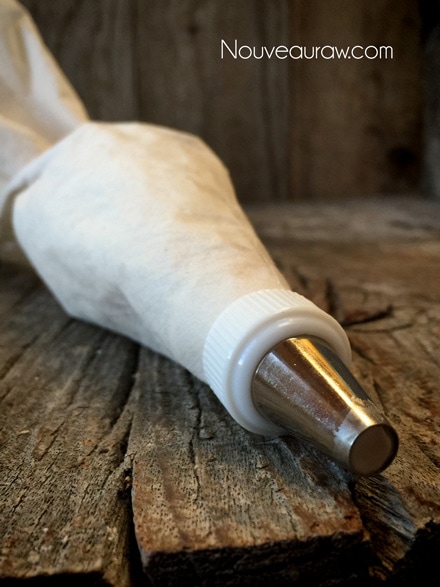
Load the piping bag.
Create a row of frosting dots, starting from the top to the bottom.
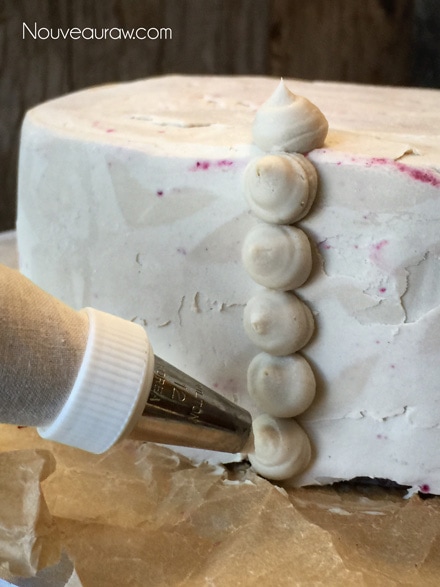
Use the tip of a very small spoon to drag the frosting out.
Practice this on a cutting board before doing it on the cake.
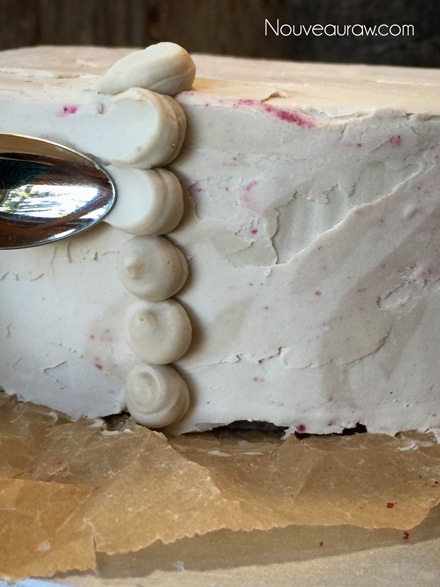
After you complete each row, make another row of dots, repeat…
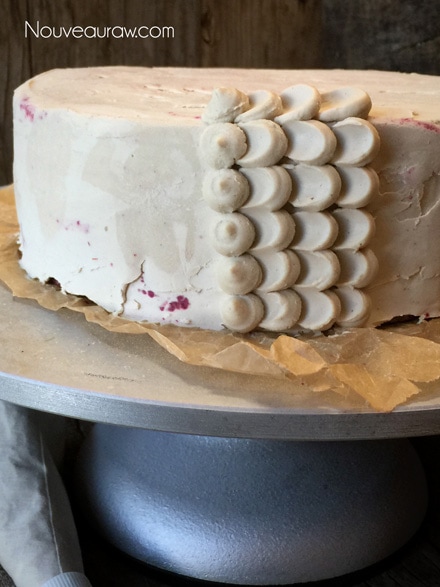
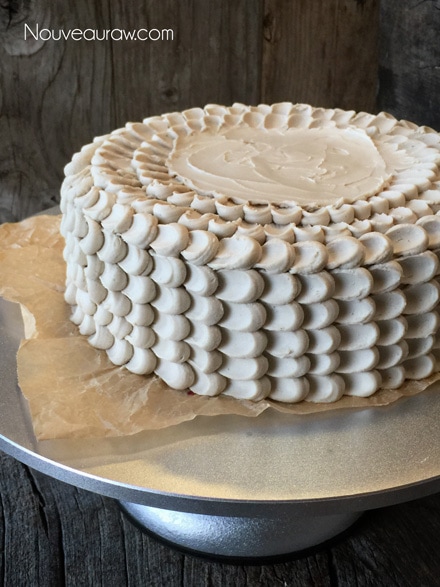
I started to create petals of the top the cake…
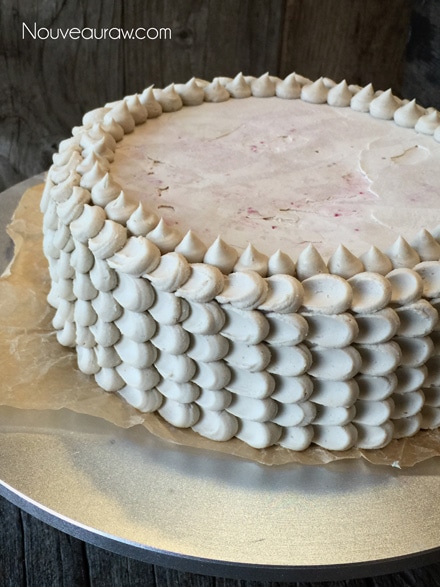
But ran out of frosting! hehe As you can see.
Strawberries to the rescue!
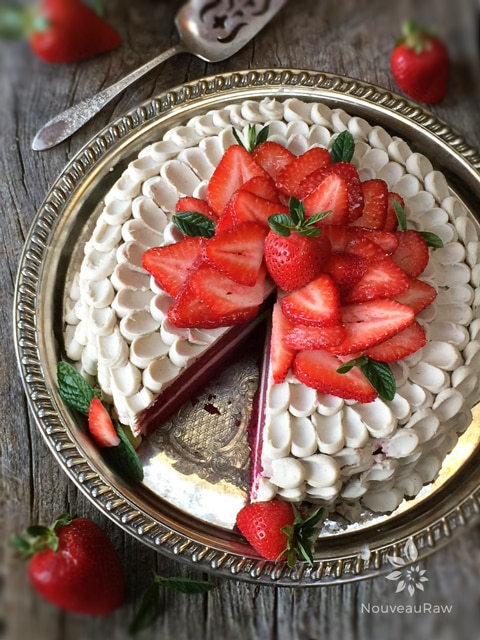
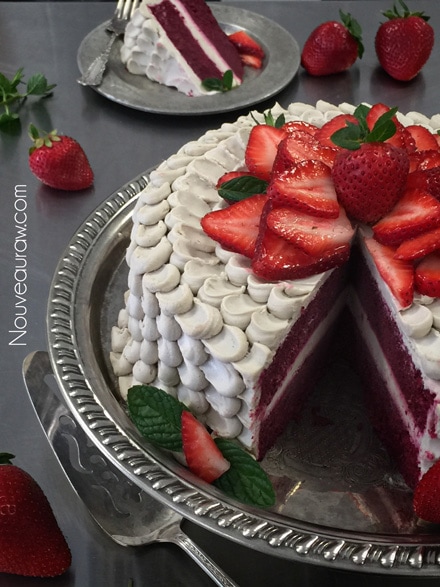
For me the scariest part… cutting the cake. :) Please read the link
above on how to cut a cake, making clean lines.

© AmieSue.com
Tags: Almond Pulp, Dairy Free, Gluten Free, No Dehydration Required, Refined Sugar Free, Soy Free, Vegan


 Add to favorites
 Ingredients:
Wow! Just wow! :-) I’m planning on making this cake for my boyfriend’s birthday. One question about the icing. Can I substitute the sunflower lecithin with psyllium husk? I’m afraid to just leave out the lecithin :-)
Hello Nancy,
Personally, I wouldn’t but it might work (haven’t tested it). Lecithin is an emulsifier and thickener whereas psyllium is just a thickener… it can sometimes give a recipe a gummy texture if not careful. I hope your boyfriend enjoys the cake. Keep me posted. Blessings, amie sue
Hi Amie-Sue, can I use non GMO soy lecithin?
Yes you can Elli :)
I am just blown away with your work! I truly admire you and I want to thank you for such a great collection of recipes.
Thank you Sara… I appreciate your kind words. I hope you enjoy some of the recipes and stay in touch. Blessings, amie sue
One my test run, I substituted Udo’s oil for the sunflower lecithin (it was all I had on hand) and my icing turned out wonderful! And just so you know, this cake does travel well if kept refrigerated. I placed on platter and put on the very top of ice chest and icing in separate container. I iced once I arrived to my vaca destination and enjoyed immensely! Can’t wait to make for my actual birthday:) Since it was created for me:) Thank you Aime Sue
That is great Kay… I really appreciate you coming back to comment and share your experience. :) Always good to do a test run so you know what to expect. Have a blessed weekend, amie sue
Hi,
I’m making this now ,so far so good ,have not done the frosting and decorating yet.How long can the cake be left in freezer?
Also my cake doesn’t look as high as yours, can you share what pan you used?
One thing I wasn’t sure between pouring in the first layer of frosting do you just leave the rest of the cake batter at room temp.?
Thank you ,you are inspiring!
Nancy
Hello Nancy…. let’s see if I can clarify things for you :)
Q: How long can the cake be left in freezer?
A: A month if well sealed and protected. :)
Q: Also my cake doesn’t look as high as yours, can you share what pan you used?
A: My pan is 8 x 3 1/2″
Q: One thing I wasn’t sure between pouring in the first layer of frosting do you just leave the rest of the cake batter at room temp.?
A: You can leave it at room temp or place in the fridge. Keep it covered so it doesn’t get dry.
Hope this all helps. So happy that you are giving this cake a try! Can’t wait to hear how it turns out. Kitchen blessings, amie sue
This is the fantastic Amie! You’re a real raw master chef! Thank you for your work! Eva
Awe thank you Eva. I appreciate that. Have a glorious day! amie sue
amazing!!!!
Thank you Bambinola. Did you try making it yet? Have a wonderful weekend! amie sue
Hi, it’s Penny Hopp. Well, your cake is beyond fabulous so I’d like to give it a try. First of all, my normal round cake pans are only 2 inches high, I also have a pan that’s 7 inches across and 2.5 inches high….so neither are the right size. You pan is taller than I’ve ever seen, can you share where you bought it, maybe I can order it on line? Thanks SO much for everything you share with us😘
Good morning Penny,
I had to do some real digging to find the right pan for you. The one I have doesn’t have any brand name or anything on it. It is 8″ round, 3.5″ high and have a removable bottom. Love this pan. I found one on Amazon that is even a smidgen taller so it will work great. Here is a link to it: https://nouveauraw.com/equipment/pans-forms-molds/carbon-steel-non-stick-8-inch-round-cheesecake-pan-with-removable-bottom/.
Let me know how the cake turns out. I really enjoyed making this one. Blessings and have a wonderful weekend. amie sue
I made this cake for my daughter’s and my birthday party (we share a birthday!) back in September. It was a hit! The cake was moist and delicious and the frosting divine! I was so eager to try the petal effect, but alas, I didn’t make it thick enough and it didn’t set firm enough to hold up. It was also still hot here in the California valley so my kitchen was less than accommodating! The flavor and body of the frosting was still great though and I made up for the decoration with fresh sliced strawberries. Thanks, Amie Sue!
Good morning Gracefulheather,
What a wonderful blessing that you and your daughter share the same birthday! What an awesome birthday gift that you gave yourself. hehe So happy to hear that you enjoy this recipe. I find it so beautiful to look at and I love how cake-like it is. I am touched that I was able to be a part of the celebration. :)
Frosting can sometimes be tricky specially in warm weather climates. I find that I have to put the frosting in the freezer until it hits that right texture to pipe with. Or I will freeze it for 1-2 hours, after making it, then transfer to the fridge overnight. But in the end, it sounds like the cake was still a hit. Awesome!
Thank you for sharing and have a blessed day, amie sue
Hi Amie-Sue,
Thank you so much for sharing such a brilliant recipe! I am definitely going to try this out as soon as I can!
I was just wondering, as I usually make raw cheesecake that rely on being frozen to stay set – with this cake, can I take it along to a birthday party and it sit at room temperature for a few hours? Or would it completely fall apart? I live in Australia and my frozen cheesecakes only last literally 5 minutes before turning to mush.
Thanks in advance from me and my family’s tummies!!
Ash
Good afternoon Ashley.
You’re welcome. :) When I have made this cake, it has help up for at least 4 hours (maybe longer) on the countertop. Our house usually sits at 68-70 degrees (F). I am not sure what your house temps are but you can judge it based off of what I shared. Please keep me posted on how it goes. I hope you enjoy the recipe. Blessings, amie sue
Can I use almond flour instead of the almond pulp? Will it have a different texture? Thanks in advance!
Hello Maria,
The texture will be very different. The almond pulp gives the cake that spongy / fluffier texture. The almond flour will cause it to be denser. I hope that helps, blessings. amie sue
Hey there, thank you so much for this recipe! I just made it over the weekend to bring in to work and share with my neighbors yesterday and it turned out ahhhMAYzing! I made it in two-layers and I still have about half in my freezer.
I did switch up one ingredient, though. I went to get out my trusty jar of coconut oil and IT WASN’T THERE! D: —so it occurred to me that I happened to have more cocoa butter! Long story short, I melted a cup of that and used it in the frosting and OMG, OMG, OMG…what an amazing difference in this cake! Soooo chocolatey!
That sounds delicious Terri. Great job on using the ingredients that you had on hand. I really appreciate your comment! blessings, amie sue
Hi Amie Sue,
What would you think about having this for a 3 y. o. birthday party? I know kids can like simple flavors. My brother has asked me to make my niece a birthday cake. This just looks so amazing. Also, any idea how many it will serve….and would you pls suggest alternatives for the agave? Thank you for the massive inspiration, as always.
Mary
Good afternoon Mary,
I think it would be just fine actually. I made a cake very similar (https://nouveauraw.com/raw-recipes/desserts/ruby-red-velvet-cake/) for a little girl who was turning 5 and she LOVED it. As far as how many it will serve depends on the size of the cake pan that you use.I used an 8″ pan and that will serve 10-14. But it might do more since you will serve smaller pieces to kids. You could make it a single layer and a rectangle pan which would lend to smaller pieces for the young ones. I removed the agave and replaced it with maple syrup. I don’t use agave anymore… I have been working on making that adjustment throughout the site, but it takes time. :)
I hope this is helpful. Please keep me posted! blessings, amie sue
Thanks so much Amie-Sue. I think I’m going to go for the double decker and follow your guide for decoration, because it’s just so gorgeous. This may be a strange thought…but I’m wondering if I could do the two layers in two different springform pans. Neither of them are as high as yours. Would that be tricky to transfer over? Also, I’m traveling to Corvallis for CA and am going to try and get as much done as I can in advance and travel with a cooler. Do you think I could pre-freeze the components?
Thank you again. I showed my brother a photo of your cake and he was in awe of how beautiful and “elegant” it was. He said, make that one.
Sounds good Mary. Your question doesn’t sound strange at all. :) By all means, use two Springform pans, I have done that in the past. I would do one layer and a layer of frosting in one pan and the other cake layer in the other pan. Freeze them, then transfer them together. Prefreezing them for the travels will be just perfect. I can’t wait to hear how it goes. Safe travels. Blessings, amie sue
Hi Amie-Sue, I’m going to have access to two springforms…one is 11 x 2 1/2 and the other is 11 x 2 1/4. Is there a way this cake could work with these? Also, I have one that I could travel with if need be, that is smaller than both of those. I’d love your mega creative thoughts on this? Yours is just so beautiful.
Hello Mary… You can really make any pan work. These will work, the layers will just be shorter. You could make a beautiful cake with them! I can’t wait to hear how it goes! blessings, amie sue :)
I can’t believe I never wrote you (5 years ago) to share how amazing this cake turned out. It was a work of art and so light and beautiful. Albeit, my frosting ended up light pink as it picked up some of the beet. Which was perfect for a little girl’s party.
The reason I’m back is that my sister-in-law has literally been asking me to make it again since that time. I’m wondering now if there is any sub for the 4 cups almond pulp. It just means making a ton of almond milk.
Good morning Mary,
It’s never too late to reach out… :) I am so glad that it turned out and I love the idea of pink frosting for a little girl’s party. How sweet and precious.
You know, I don’t have a substitute for the almond pulp. Is there one? Most likely but I haven’t tested anything else to where I can safely say. I know it requires making almond milk but look at this way… You can freeze the almond milk in measured out portions (the amount you would use within a few days) and Boom you have a supply of almond milk premade for you. *shrugs* It’s an idea.
I hope all is well on your end, so nice to hear from you. hugs, amie sue
Thanks so much Amie-Sue. I’ll let you know. :)
perfect for Canada Day and July 4th … shared with love at ~ https://naturegodforbeauty.blogspot.com/2019/06/red-velvet-cake-recipe-vegan-healthy.html
Words cannot describe how ridiculously delicious this cake topped with your raw white frosting is. It’s so heavy and rich. Making it was well worth the time and effort. Thank you for creating these awesome raw delights!
Good morning Libby,
I am so happy to hear that you have been enjoying this recipe. It is one of our favorites too! Thank you so much for leaving a comment. blessings, amie sue
I was happy to see a comment about this cake this morning. I made it 5 years ago, for my niece’s 3rd birthday party and my sister-in-law still asks me to make it again. I’m wondering if you’ve ever used a substitute for all or some of the almond pulp, which might be faster and possibly lower in fat. Thanks Amie Sue.
Hello Mary,
It is an amazing cake recipe for sure! I haven’t tried anything else to replace the almond pulp… Once I got the recipe to this stage, I didn’t want to mess with it. lol. Plus, the almond pulp is KEY for the texture of this cake so using something else in its place would dramatically shift the taste and texture… something I don’t want to mess with. :) blessing and have a great day! amie sue