
Background Color

 Add to favorites
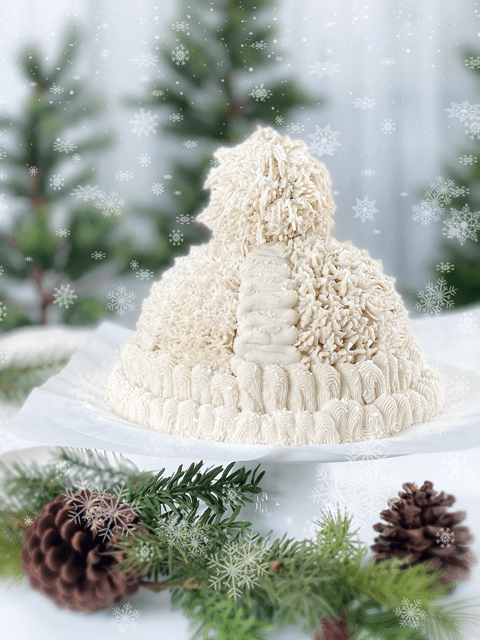
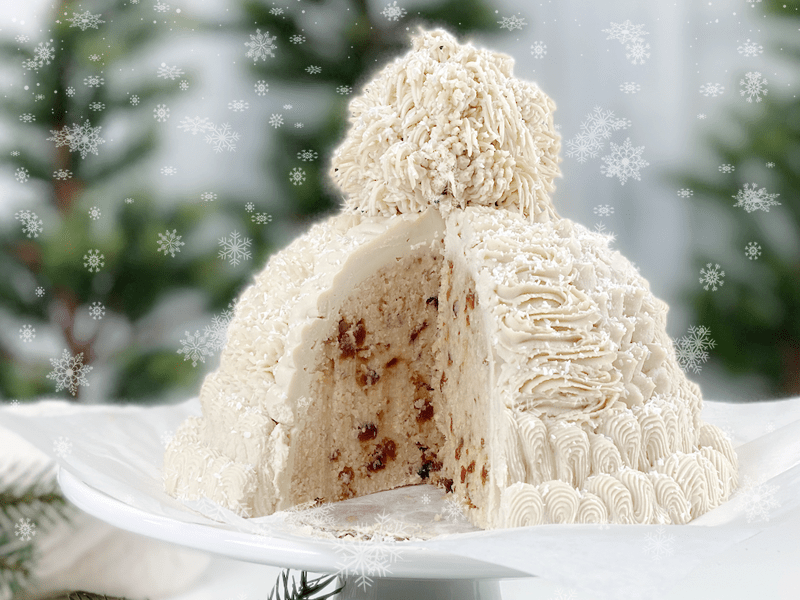
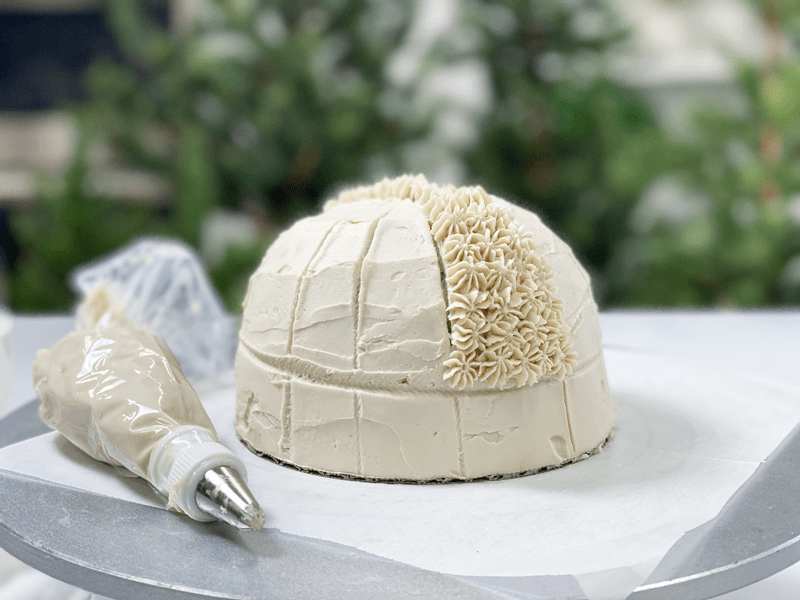
No knitting needles needed to make this cozy winter bonnet! With a variety of pastry tip shapes, you can create a knitted-wool look on your cake, too. And after your guests are finished admiring this culinary masterpiece, just slice it into a cranberry-chip-filled surprise. Today’s creation is raw (no baking required), vegan, and gluten-free. Heck, it doesn’t even require dehydration; it just requires some imagination and the desire to have fun.

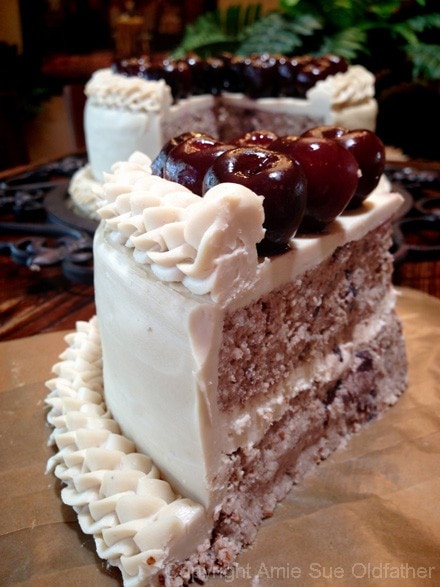
I titled this recipe Cranberry Chip Winter Bonnet because the cake batter reminded me of my all-time favorite childhood cake — Betty Crocker Cherry Chip Cake, which my mother used to make every year. In fact, my mother still sends me Cherry Chip cake on my birthdays.
Actually–she sends the empty box with fun little notes written all over it since I no longer eat the ingredients used in it. I will post a photo of them toward the end of the post. I am going to put a pause on getting too caught up in childhood memories and dive into this recipe. I have a lot of technical details to cover in hopes of building your confidence so you will decide to make this cake yourself. Plus all the tips and tricks that I share can be used later down the road in other culinary creations. Ready?!
Cake Batter
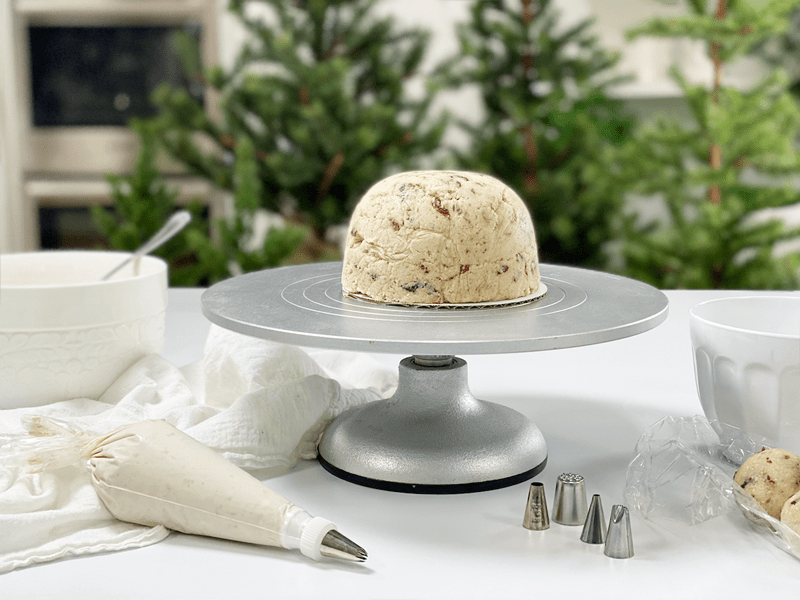
Selecting the Cake Shape
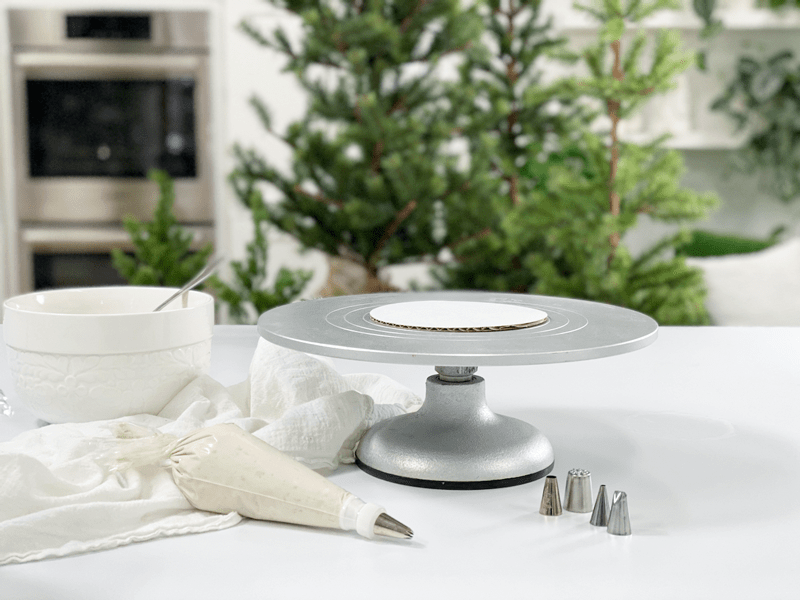
Piping Bags
Piping Tips
Frosting Tips
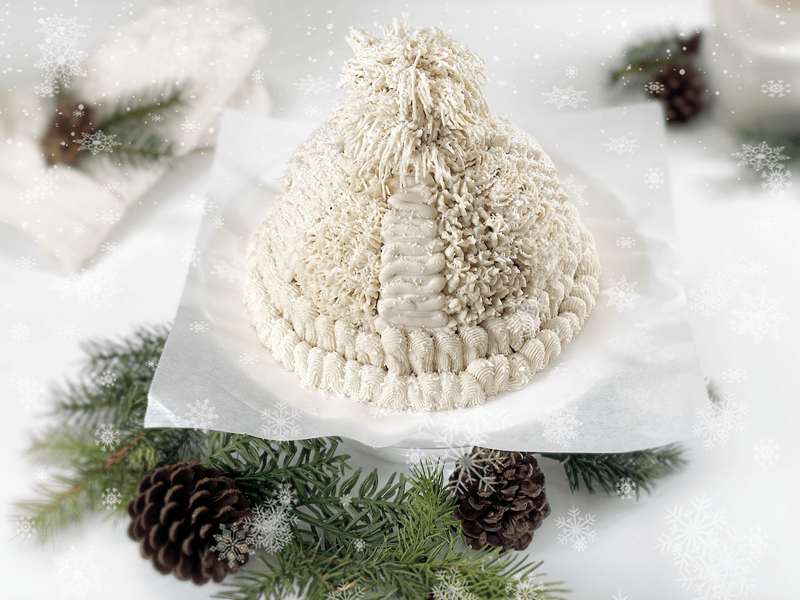
This cake doesn’t require baking or dehydration. The cake is creamy white, moist, and has beautiful chewy flecks of red dried cranberries laced throughout. Despite not being baked, it holds its form and slices up wonderfully. It is sweet as a cake should be, but not overwhelmingly so. The sweet and tart cranberries pair superbly with the coconut cake base, giving you a mouthwatering bite that keeps you coming back for more. Please be sure to leave a comment down below. Have a blessed day, amie sue
IngredientsYields 3 cups batter
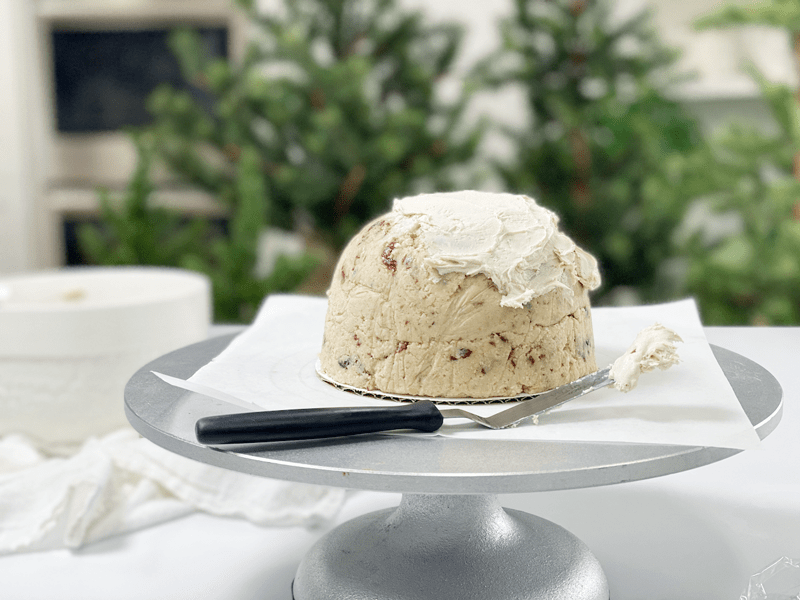
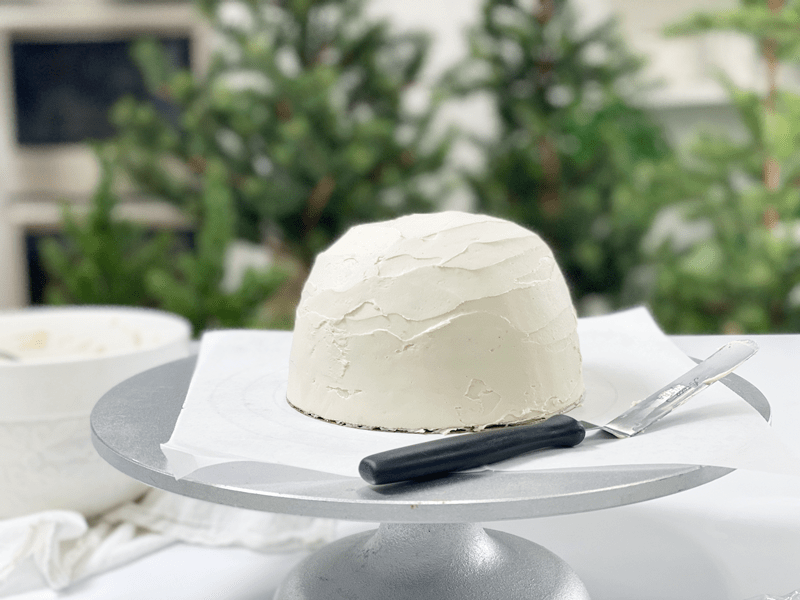
Frosting
yields 5 cups frosting
Frosting
Cake Batter
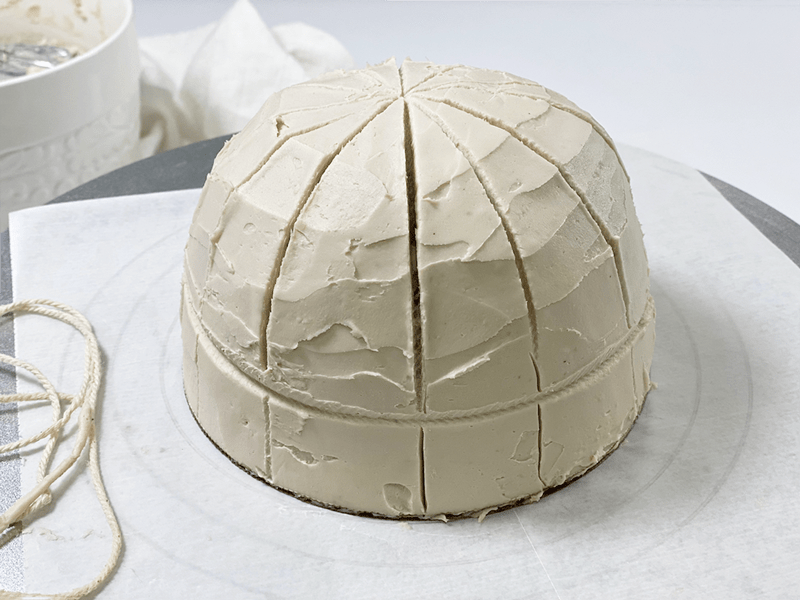
Decorating the Cake (refer to photos below as well)
Storage and Shelf Life


As mentioned above… here is a picture of the Cherry Chip cake mix boxes that my mom sends to me for my birthdays.
I can’t believe nobody has made a comment here yet! This is just such an impressive looking cake…I wonder if anyone else here has made it. Amie-Sue you are such an artist. I see this cake in my future. :)
Good morning Mary,
I must have a hard crowd to impress. I hope you feel inspired to give the recipe a try. Have a wonderful holiday season, blessings. amie sue
I’m going to make this Amie.
Also-are you ever coming back to us?
Good morning Ann,
Keep me posted if you do. :) I had so much fun making this cake.
I hope to come back. My life has been so busy and I have to find a balance to where I can. I sure do miss it, I will tell you that!! Thank you asking, it was really sweet.
Have a blessed day, amie sue