
Background Color

 Add to favorites

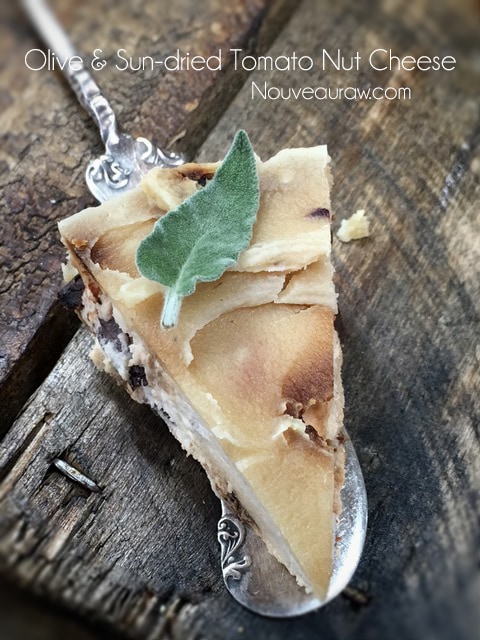
~ raw, vegan, cultured, gluten-free ~
I originally posted this recipe in 2010. I have made it several times over but thought that I would finally update the photos and make a slight modification in the ingredient list.
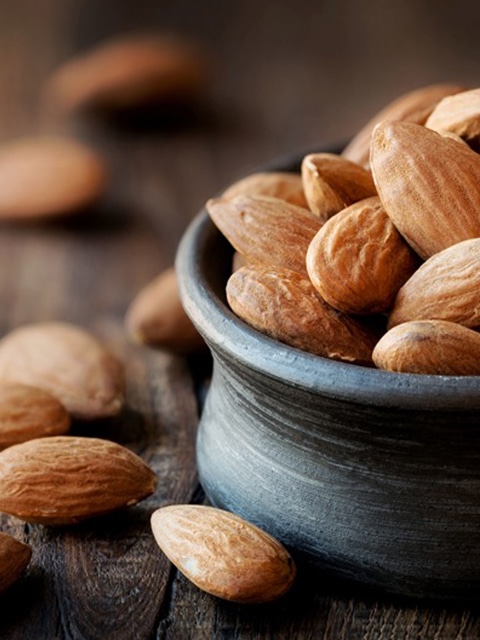
When I first created this recipe, I used 2 cups of macadamia nuts. But over the years, the price just keeps on rising, without my pocketbook following suit. So I have been using just one cup of macadamia nuts and one cup of cashews.
The flavor has basically remained the same, but it doesn’t deplete my bank account as much. If cost isn’t an issue for you, use 2 cups of macadamia nuts. Both versions are delicious. The love affair with macs is that they add a buttery flavor and a subtle sweetness.
One thing I have come to learn with mac nuts is always testing them, even before purchasing them (if possible). Due to their high-fat content, they are more prone to going rancid. Never purchase bulk macadamia nuts–who knows how long they have been sitting in the store aisle, at room temperature? That’s my opinion, anyway.
They need to be protected from moisture, otherwise, the nuts will lose their crispness and have a shorter storage life. Oxygen will cause rancidity if the exposure is prolonged. Personally, once I bring them home, they go straight into a recipe or into the freezer. Technically, cold storage is not necessary when macadamias will be eaten within a week or two, but I like to protect my investments. You will know when they have turned; they will often take on an unpleasant bitter taste, and your nose will pick up on the off odor that they create. It’s time to get busy in the kitchen. Grab your apron, and I will meet you there. I hope you enjoy this recipe. Many blessings, amie sue
Ingredients:Yields 6″ cheese wheel
Once fermentation is complete, stir or process in the following ingredients:
Then stir in the following:
Assembly:


This looks great. One question. Would it work to put it in the Excalibur to create a rind on the outside and firm it up a little more?
Absolutely James. Place in a dehydrator at 105 degrees for 24 hours to get a good rind on it. Have fun and keep me posted if you try it. amie sue
Maybe this is dumb question, but can I substitue LIQUID probiotics instead of the powder?? Your website is priceless and I have fallen in love! : )
Hello Nia,
There is no such thing as a dumb question. :) Gosh, I haven’t used a liquid form but to be honest I don’t see why not. The texture of the probiotic doesn’t add anything to the over all recipe. It’s the fermenting reaction that gives it the magical properties in recipes such as these. Might have to play around though with the quantity used. If you try it, keep us posted. We learn new things every day! amie sue
I just want to express my appreciation for your site, which I visit often. I just made this, and — after a year of making nut cheeses of all types, sources, and consistencies — think you should know that this recipe yielded the best-tasting nut cheese thus far.
FYI: Dehydrating per the instructions above resulted in a dark brown rind; it appears to be a bit singed (if such a thing can happen in an Excalibur) but still tastes amazing. Many, many thanks!
Thank for commenting Navva. The whole purpose behind the dehydrating of the “cheese” is to create that rind effect. The Excalibur isn’t actually singeing the product, it would just be a reaction between the ingredients and drying process. I am thrilled that you enjoyed this recipe. Have a wonderful day, amie sue
hi there, would like to know why you only have 7 days to use the nut cheeses…….. is their a way it can be made to keep longer?? or to mature for stronger flavor?? kind regards
Alet – South Africa
Alet,
When I put “expirations” on these raw recipes they are estimates. I can’t say for sure how long a raw product will last. No one can unless they send it to a lab and have it analyzed. I go off of experience. It may last longer, but that will be for you to determine once you made it. If it starts to smell bad, taste bad or grow bacteria on it, I wouldn’t eat it. To mature a stronger flavor you can have it “culture” longer in the making stages. Once it goes into the fridge that action slows down considerably. amie sue
Hello Amie-Sue,
Have you ever tried making a raw bleu cheese?
Pat
No I sure haven’t Patricia… I am not a fan of bleu cheese so it would be hard for me taste test it hehe
I am so anxious to get my dehydrator. I want to try this recipe. What size mold/s do you use and where could I buy them? Thanks BJ
Hi BJ…. what dehydrator did you order? I am so excited for you. It will open a whole new world for you. :) As far as the mold goes… You can use about anything but one thing that I tend to use quite often are the mini spring form pans. https://nouveauraw.com/equipment/pans-forms-molds/kaiser-bakeware-noblesse-non-stick-mini-springform-pans-set-of-4/. Have a blessed weekend, amie sue
looking forwould to trying the ricipes
I hope you enjoy them Claire, please keep in touch! amie sue
Hi Amie, i would like to use whey or rejuvelac to make my cheese instead of the probiotic poweder. My family and I drink raw goats milk so I’dl like to start experimeninting with whey or rejuvelac. How much do you think i should use.
kind regards Martha
Hello Martha,
I would use about 1/2 cup of rejuvelac and maybe 1 Tbsp of whey. Let me know how it goes if you try. :) Have a great weekend, amie sue
more deliciousness!! can one use a nut milk bag in lieu of cheesecloth?
i have been using dr. higa fermented and raw pro biotics for awhile ; think u would like it! xxxx
Good afternoon Dana,
Yes, you can use a nut bag instead of the cheesecloth. I have used both over the years. :) I am sure I would like Dr. Higa’s probiotics. I haven’t found too many that I haven’t hehe. Have a blessed and wonderful weekend. amie sue