
Background Color

 Add to favorites
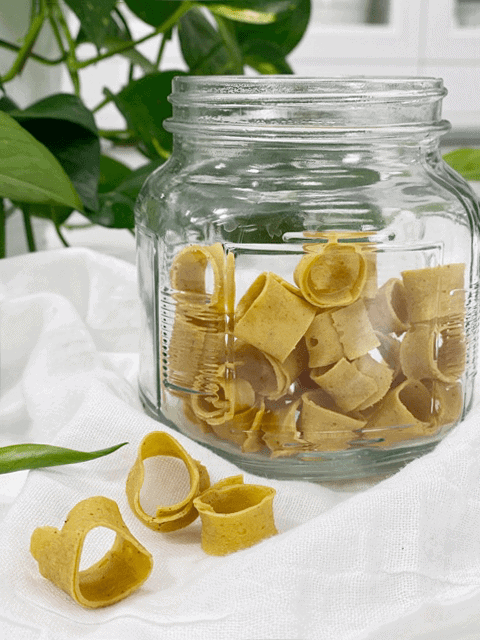
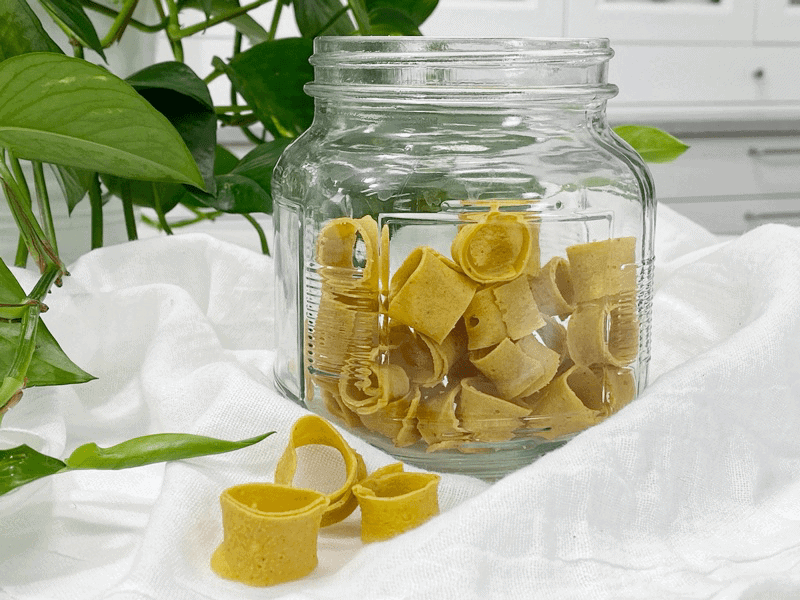
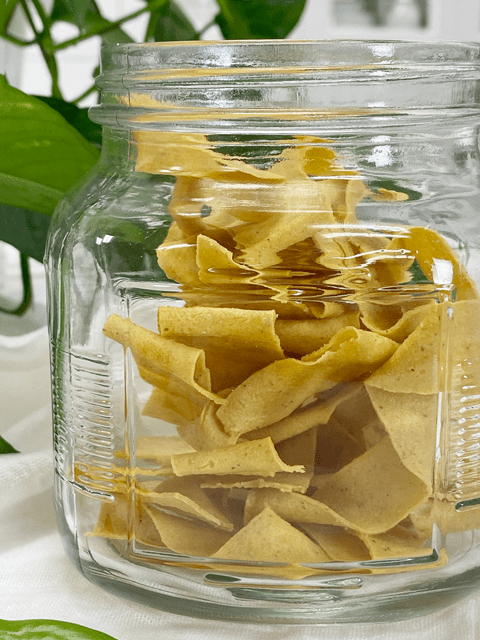
Who doesn’t love cheesy fun-doodles?! What? You’ve never heard of them? It’s an ol’ Scandinavian / Norwegian (my heritage) treat.. that I just created! Never to be seen or tasted anywhere else but here! A crispy, snappy, flavorful, salty, cheesy snack. Each crave-worthy bite is nut-free, vegan, gluten-free, soy-free, and grain-free. (That just gave you goosebumps, didn’t it?)
This recipe came into existence because I am a master when it comes to “playing with my food.” Did you ever hear, “Don’t play with your food!” as you were growing up? Well, now it’s my job! (Take that, Mom!) Whenever I make, create, or design a recipe, I always split up the batter and think of different ways to use it. I honestly can’t help myself.
You don’t have to be a trained chef to create something delicious in the kitchen. Just follow the recipe, right? Being told to use our creativity in the kitchen can be a bit intimidating…I mean, what if we mess something up? But I have learned from working with raw recipes that they are so forgiving and transformable! Cookie recipes quickly transform into a breakfast bar, granola, or cereal. Bread becomes crackers or croutons.
Recipes are a fantastic tool. They can encourage us to prepare healthy foods for ourselves and get more comfortable in the kitchen. The truth is, I still occasionally use recipes, but nowadays, I use them as guidelines and inspiration.
Have you ever thought of recipes in that light? If not, let’s take a moment to do so. Since recipes come from someone’s ideas, they’re ultimately shaped by that person’s opinions, tastes, and preferences. If you have specific food allergies, dietary restrictions, or lifestyle that you choose to follow (vegan, raw, paleo, etc.), think about how to reshape a recipe so you can enjoy it. That is something that I repeat over and over throughout my site. I want you to enjoy my recipes, but I want you to become familiar enough with ingredients, measurements, textures, and flavors to find the confidence to accommodate your family’s needs.
Keep the following rules in mind:
You know, I now realize that the writings I share with each recipe post are written in the same manner as I design a recipe. Most of the time, I never quite know the outcome (of a recipe) or what I am going to talk about (in the post). It all unfolds organically and stems from my heart and inspiration. I am so thankful for this “platform” in which I work. It allows me to be 100% me.
I had no idea that I was going to talk about modifying recipes when I sat down to share this recipe with you, so I’d better take a moment to chat about the recipe at hand. Good idea, huh? When I was designing these little crunchy cheesy snacks, the first thing that came to mind was “cheesy fun-doodles!” They are cheesy in flavor and fun to make. And to be honest, just looking at them brings a smile to my face. They are super easy to make. In fact, the hardest part is waiting for them dry so you can enjoy them. I hope you enjoy this recipe. Please keep me posted below as to what you think. Blessings, amie sue
Ingredients:Cheese base:
Agar slurry:
Cheese base:
Agar slurry:
Forming the fun-doodles


It looks yummy!!
Thanks so much :) I hope you give the recipe a try. blessings, amie sue