
Background Color

 Add to favorites
One day, I went hog wild and created two large batches of my Vegan Sweet and Spicy Cheese. I am not really sure what the heck I was thinking. But then again, it is nothing for me to make an overabundance of food… I do like to share. But, the days were busy, and the cheese was put into the fridge and forgotten about until later in the week.

Knowing that we couldn’t possibly eat it all before it went bad, I decided to do an experiment and see how the cheese with agar would dehydrate. Move over kale chips! I am not saying that it is good to eat this cheese in the same abundance as a person would with kale chips… I am just referring to the addicting flavor.
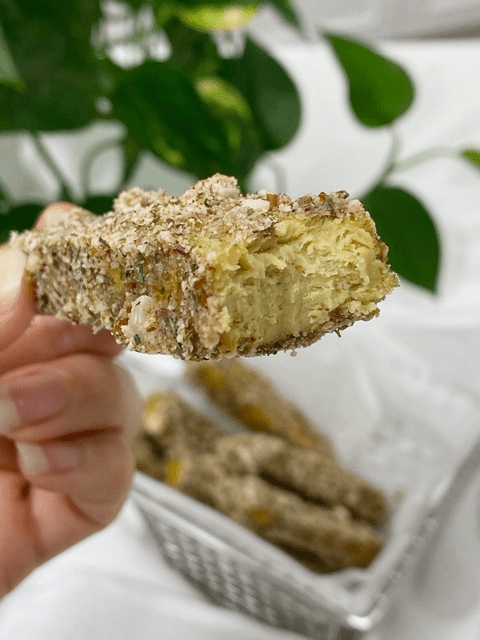
Here is the crucial thing with this recipe… The first time you make it, keep checking the cheese sticks as they dry. Taste test and look for the texture that you want. Personally, I found all levels of dryness delicious.
The texture goes from soft to chewy, never really getting hard. But I am warning you; it is hard to stay out of the dehydrator while they are drying. Once you find that perfect texture that you are happy with, jot it down for the next time you make them.
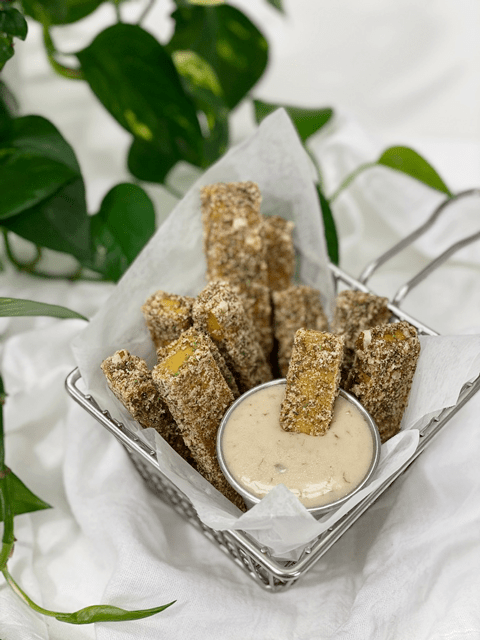
You can cut the cheese sticks into any shape or size that you want. I even cut some up into cubes and used them as croutons on my salad. Hot-diggity-dog… they were terrific.
They taste amazing all on their own, but they also are lovely dipped into the Discovered Valley Ranch Dressing. I do want to clarify that they are not stringy like the cheese sticks that you buy from the grocery store. But they have an excellent mouthfeel, and the flavor is quite amazing. The more it dries, the more intense the flavor becomes.
The day that I made these sticks, some friends came over just as I was taking them out of the dehydrator. Between the four of us, they were ALL gone within 30 minutes. It happened so innocently too… we just kept talking, nibbling, talking, nibbling, and before we knew, they had disappeared.
I did the nutritional data for the whole recipe; that way, you can just divide the quantity you created since we can make so many fun shapes and sizes. I can’t promise that I will do this for every recipe, but I am going to give it my best effort since many people email me, asking for this information. Keep in mind that the numbers can change based on what brands of you use, so utilize it as a baseline. I hope you enjoy and please comment below if you try the recipe. Blessings, amie sue
Whole recipe ~ Calories 1,829 / Fat 146 g / Carb 88 g / Fiber 39 g / Protein 72 g
Ingredients:Cheese base:
Agar gel:
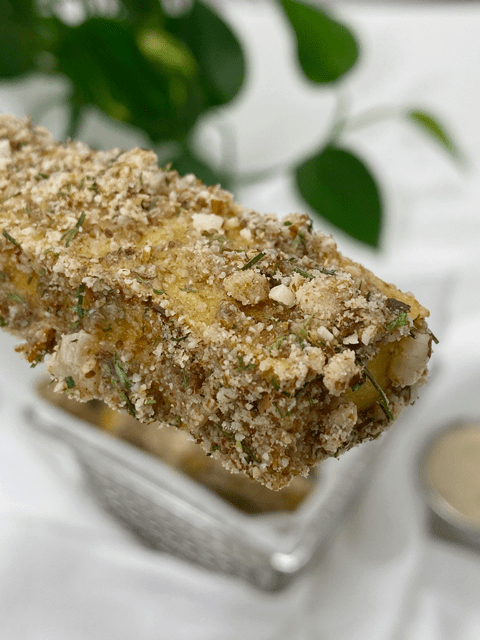
Coating:
Cheese base:
Agar gel:
Coating:

Oh Amie Sue,
Oh boy…oh boy …oh boy.. Gene can have these!! Yipee!!:]
Do you think that honey would be ok to subsitute for the agave? He can’t do tumeric, any subs. for that? :] Lastly do you have any suggestions for subsitutes for the almonds, could I use sunflowers seeds? Thanks for the recipe, your amazing!! Lyn :]
Good morning sweet Lyn…. I was thinking of Gene, so I am happy to hear this. Yes, you can use honey. The sweet flavor really isn’t noticeable, it is more for that hidden balance of flavors, if that makes sense. Just skip the turmeric, it adds a nice yellow to the recipe but since he can’t ingest it, it’s all good. If you use a store bough mustard, use a yellow mustard and that will help amp up the color.
You can use any nut or seed for the coating… each give a little different flavor but really any of them will marry well with the taste of the cheese. I am so happy that you can make this for Gene. He is always on my mind and my heart aches for his food allergies. One day, as his body heals, he will be able to eat so many more foods. :) Have a blessed day, amie sue
Thank you for the subs. but – Opps, Sorry, I didn’t see the mustard, he is also allergic to this….any subs? Thank you for taking the time to help all of us , Lyn :]
Ooops, I forgot that he can’t have mustard either… Well since that is one of the predominant flavors for this cheese, I would just season the cheese with whatever spice he can have. Maybe dill? Italian seasoning… so many to really choose from. Just need to find one that works for him. :) I hope you have a relaxing weekend my friend. amie sue
Yummmy! This I will have to try!
Please explain a bit further on the cylinder or rectangle molds, and releasing from the molds. What dimensions would you recommend to get those clean edges?
Thanks!
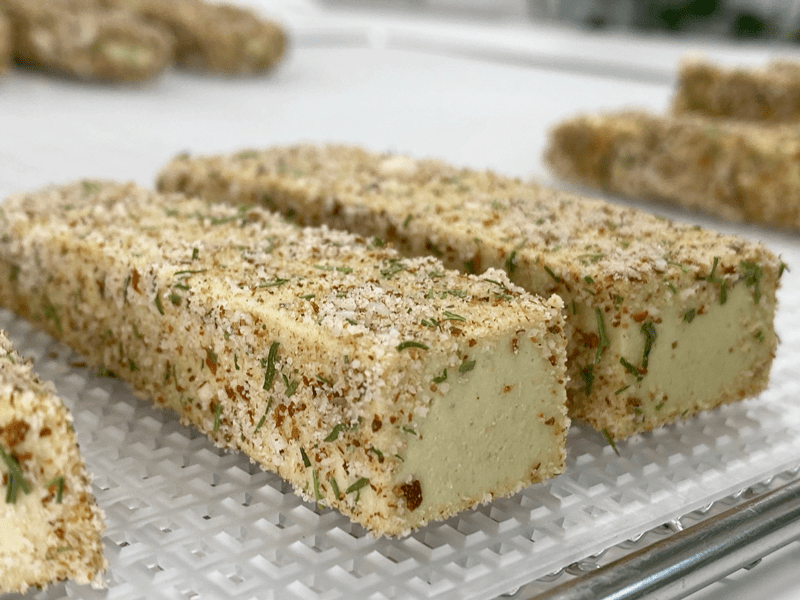
Good morning Naomi… did I ever share with you that my sisters middle name is Naomi? Every time I hear from you, it brings a smile to my face. :) <---- see?! hehe Regarding molds... to be honest Naomi, you can literally use just about any shape or mold when making these agar cheeses. If you want to make the cheese stick shape, I would recommend pouring the batter into a 8x8 pan maybe. From there you can cut it into any thickness and length that you want. Right now, actually as of yesterday, I slid a tray of this cheese into the dehydrator. I cut them into long slabs. I will be using them on sandwiches. Now, dehydrating them is not necessary for sandwich, but Bob and I love the texture and how it really brings out the flavor. For those clean edges, just use a pan with straight edges. If you don't have one, that's ok. After it is done setting up, you can take a knife and cut a straight edge. Eat the scraps. :) I don't oil or do anything to my containers which I make this type of cheese, it always just pops out. Does this help? If you have more detailed questions that I didn't address, just ask. Have a great day! amie sue
Thanks Amie Sue! Nice to know I bring a smile to you as your emailed recipes and accompanying humorare always a source of delight for me! Thanks for the suggestions. The 8×8 info was what I was looking for because I want that nice baton shape you featured. Thanks again!
Your welcome… have fun! amie sue
Hi, This recipe looks and sounds amazing and I have bought all things necessary to make it, but I do not have a dehydrator, so do they need to be dehydrated? and can I use my oven otherwise?
Thanks
Hello Roz, they don’t have to be dehydrated but they won’t have the same texture that I created here. I haven’t tried using my oven so I can’t say for sure. Just know that it won’t remain a raw product. Have a great evening, amie sue
Roz, I have a large 10 tray dehydrator. When I have just a tray of something to dehydrate, I just place the tray in my oven with just the oven light on which I have replaced with a 40 watt bulb. It warms the oven to about 115 degrees and I often just place a jar lid in the door to open it a crack for more air circulation. It can take a little longer to dehydrate than in the dehydrator so I just check periodically to to see when it is as dry as I want same as the dehydrator.
Thanks so much for the reply. I have started the process and will continue it tomorrow, and while they will not remin raw using my oven, I am not totally raw, so will try to see how it workson lowest setting, and see what happens! I hope they do not melt!!!
Yummy, can’t wait to try!
Roz
I am anxious to hear how it works in the oven Roz. I am sorry that I can’t better direct you in that department. Have a blessed weekend, amie sue
Aloha Amie-sue,
This recipe is wonderful, I made it yesterday and got rave reviews. I think I should have made a double batch.
Thank you so much for your creative recipes.
Kathy
Aloha Kathy :) Thank you so much sharing and I am thrilled that you are enjoying them as much as we did. Blessings and joy, amie sue
I’m looking forward to trying these. It’s nice that there is no oil used.
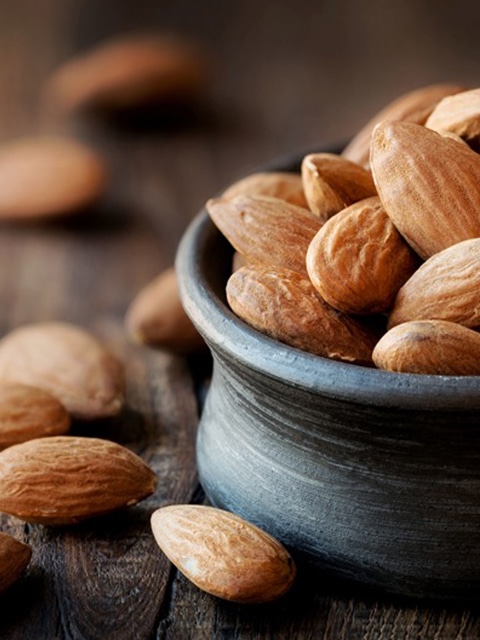
Hi Amie-Sue. Are the ground almonds in the coating simply ground from their dry state, or should they be soaked, rinsed and ground? Thanks for so many wonderful recipes!
Hello Franki,
The almonds had already been soaked and dehydrated… I then ground them. If they are wet, they will turn into a clumpy mess, so make sure they are dry. I am in the habit of soaking and drying all nuts and seeds when I bring them home. That way they are ready to go when inspiration hits me. :) Have a great evening! amie sue