
Background Color

 Add to favorites
The easiest way to get a SCOBY is just to buy a kombucha starter kit online or acquire one from a friend, but I get that it isn’t always possible. And I suppose that is why you are here reading this… to learn how to create one from the ground up. Ok, maybe not entirely from the ground up… we are going to cheat a little. We are going to piggy-back off of a store-bought raw kombucha!
If you’re not aware, 99% of the kombucha’s that you buy in the store come with a starter SCOBY in the jar. I am sure you have seen weird alien looking things floating the in there, heck you might have even swallowed them when sipping away. (which is completely fine).
These floaters are a form of bacteria and yeast that fell from the mother SCOBY when brewing. All that you need for this science experiment is; Sweetened tea and a Symbiotic Colony Of Bacteria and Yeast.
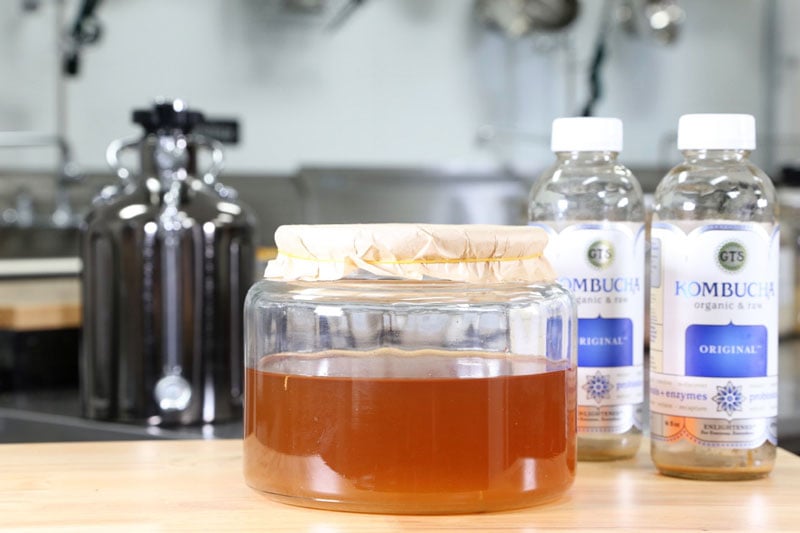
I find that the store bought GT’S brand original kombucha is the best. I haven’t tested all brands out there, but I have been successful with this one. If you can’t find this GT’S, look for a bottled kombucha that has brown and/or clear strands, and possibly even what may appear as a mini baby “jellyfish” floating around in the bottle. Whatever you do, don’t go shaking the bottle… you will have an effervescent volcano explosion on your hands.
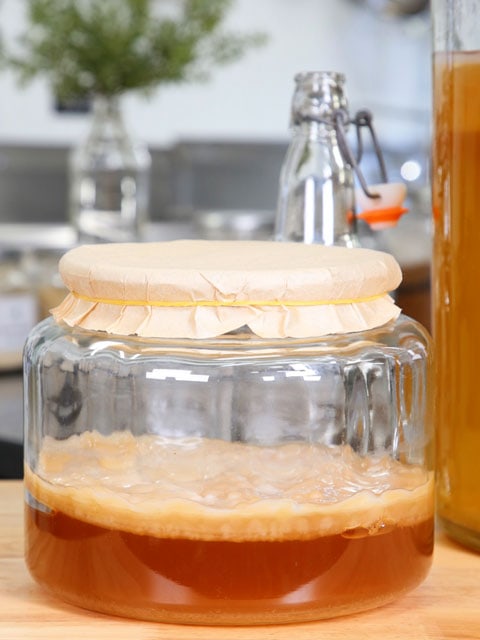
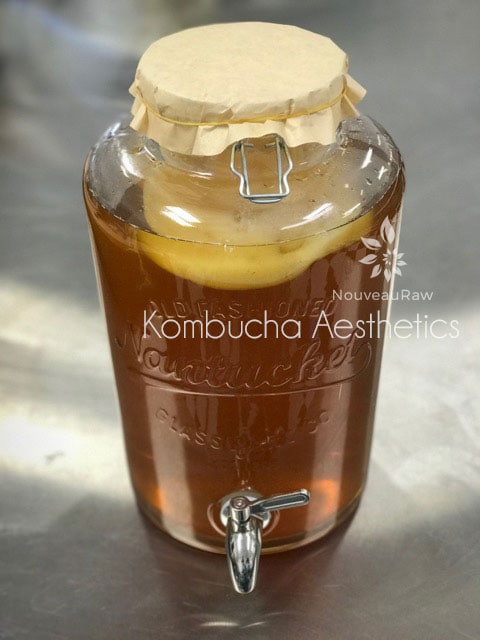
It’s important to note that when you have grown a SCOBY through this method, it will be smaller in diameter and thickness. After a few rounds of making kombucha, it will thicken, become smooth, and take a uniform color. When you see photos of large thick ones, that is a good sign of maturity.
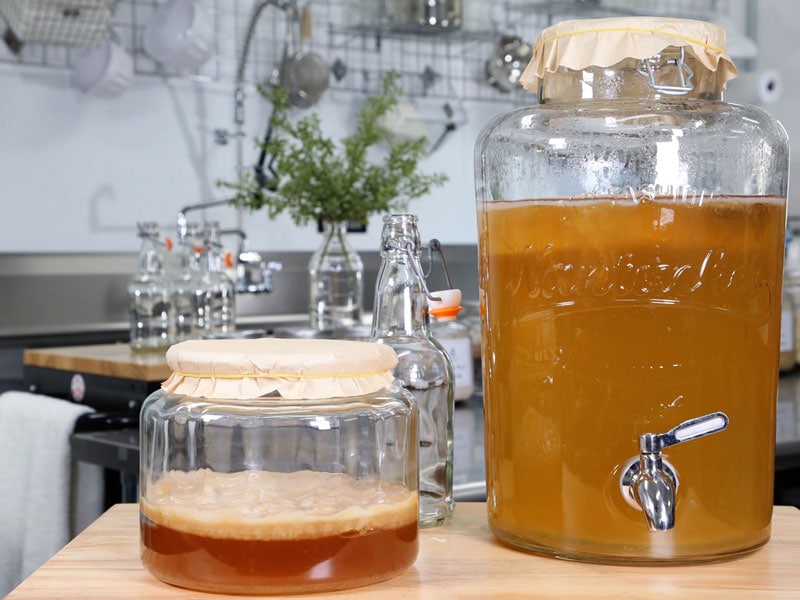
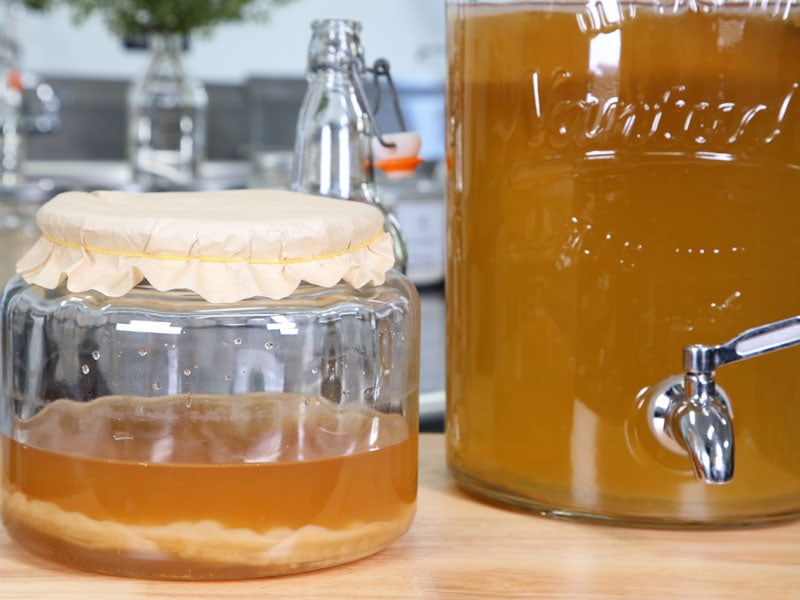
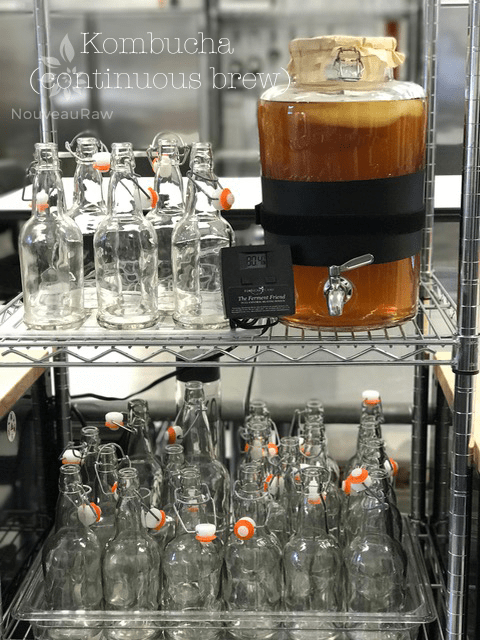
Since I practice the Continous Brew method, I use a larger brewing vessel. (2.5-gallon jar) For this size jar, I used two bottles of kombucha and two cups of sweet tea. I wanted enough to get the whole surface covered with a SCOBY. If you wish to use a small brewing vessel, then use just one bottle and one cup of sweet tea. Note – The SCOBY will grow and mature to fill the width of whatever sized container you use. Over time, you can progressively increase the size of the jar you use, and the amount of kombucha you want to produce.
It took 15 days to grow the SCOBY that you see in the photos. It is thick and very healthy. Due to the coolness in my kitchen, I had to put a heat band around the vessel to ensure that it is cultured at the right temperature. I couldn’t be any more pleased with the outcome.
Well, I think that about covers it. This is a great thing to do if you have young ones in the home since they can watch the process and see something grow! If you have any questions, please feel free to ask below in the comment section. blessings, amie sue
 Ingredients:
yields 1 SCOBY
Making the Sweet Tea
Prepare the Brewing Vessel
This picture was taken on Sept. 12th, 2018. In just 15 short days, I grew a SCOBY that was well over 1/4″ thick! It is thick and healthy!
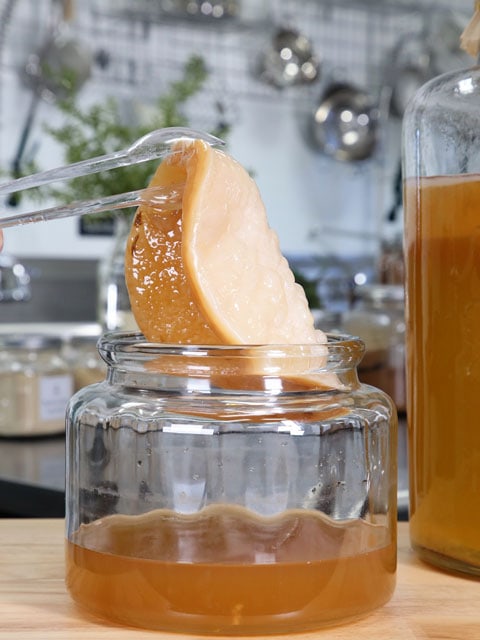
After handling the SCOBY, it sunk to the bottom of the vessel. That’s ok… it will resurface in time.

Kombucha Continuous Brew Method
Kombucha Maintenance of Continuous Brew
Testing Sugar Levels in Kombucha
Bottling Kombucha from a Continuous Brew
Second Fermentation of Kombucha – Adding Flavor & Effervescence
Hi Amie Sue! Great looking Scoby! :) I make kombucha from time to time with a purchased really thick and BIG Scoby but I haven’t tried continuous brew yet. (I know I should instead if buying kombucha. It just feels like a big step for some inexplicable reason..) In between brews I just store the Scoby in the fridge in some kombucha and feed it every now and then. We did get a small Scoby once, we called it Scrappy! (Like Scooby Doo’s little brother.) :D
Good day Veronica,
I so get that. I was intimidated to brew my own kombucha for a long time but then I finally bit the bullet and gave it a go. I learned by making the continuous brew. I haven’t made single batches and I have kept my continuous brew going for 2 years. At first, Bob wouldn’t drink it because he felt that he didn’t like it… so I was bottling my kombucha and sharing it with friends. Then one day Bob tried it, now he is the main one who drinks it in our household. hehe
Scrappy! I so LOVE that. haha I might have to use that. So good to hear from you. Have a blessed day my friend. amie sue
Hi Amie Sue. I make kombucha and water kefir. Over time or maybe it is aging I have gone off these sour drinks. I use the water kefir to make coconut yogurt and a bit of kombucha for vinegars or when pickling some vegetables but would love to have some good recipes to use them in other ways. Gluten free Sour dough bread now seems to help my digestion and is enough of the sour for me these days. Even sauerkraut is no longer of great interest.
Thanks for sharing Aeriol. We all through quite a journey as we listen to our bodies and make adjustments to meet our needs. :) So glad that you are doing well. Have a wonderful weekend. amie sue
Umm… it says add 1/3 cup sugar to the boiled water, but then under preparing the vessel it says dissolve the sugar in a little hot water…. am I supposed to only add the 1/3 cup to the sweet tea? Or do I add more to the vessel too?
Hello Tammy,
Well, that was a weird snaffo. I fixed it to read correctly. Sorry about that. Thanks for asking so I could fix it. Blessings. amie sue
It now reads…
Prepare the Brewing Vessel
Sterilize your kombucha growing container.
Make sure the container has cooled before adding the kombucha to it.
Pour the store-bought kombucha and sweet tea that you made in the vessel.
That’s what I figured you meant! Thanks for clarifying!
You bet :)
What is a heat band and where can I purchase one?
Hello Merilynn,
Click on the following link were I talk about all the supplies I use, including that heat band. blessings, amie sue
gotcha …Thank you